User manual and tutorial of the demonstration for OpenSOP (Open Standard Operating Procedure)
2016/02/15

Login Information
- SOP server (for SOP editor and supervisor)
http://DOCKER_HOST:PORT/sop/
(First, please access and login to the SOP server.)
- SOP client for iPad (for worker and co-worker)
http://DOCKER_HOST:PORT/sop/tablet/
(Second, please access and login to the SOP client from iPad after the template uploading process.)
- SOP account manager (for system administrator)
http://DOCKER_HOST:PORT/sop_mng/
(End-user doesn’t need to access this account manager.)
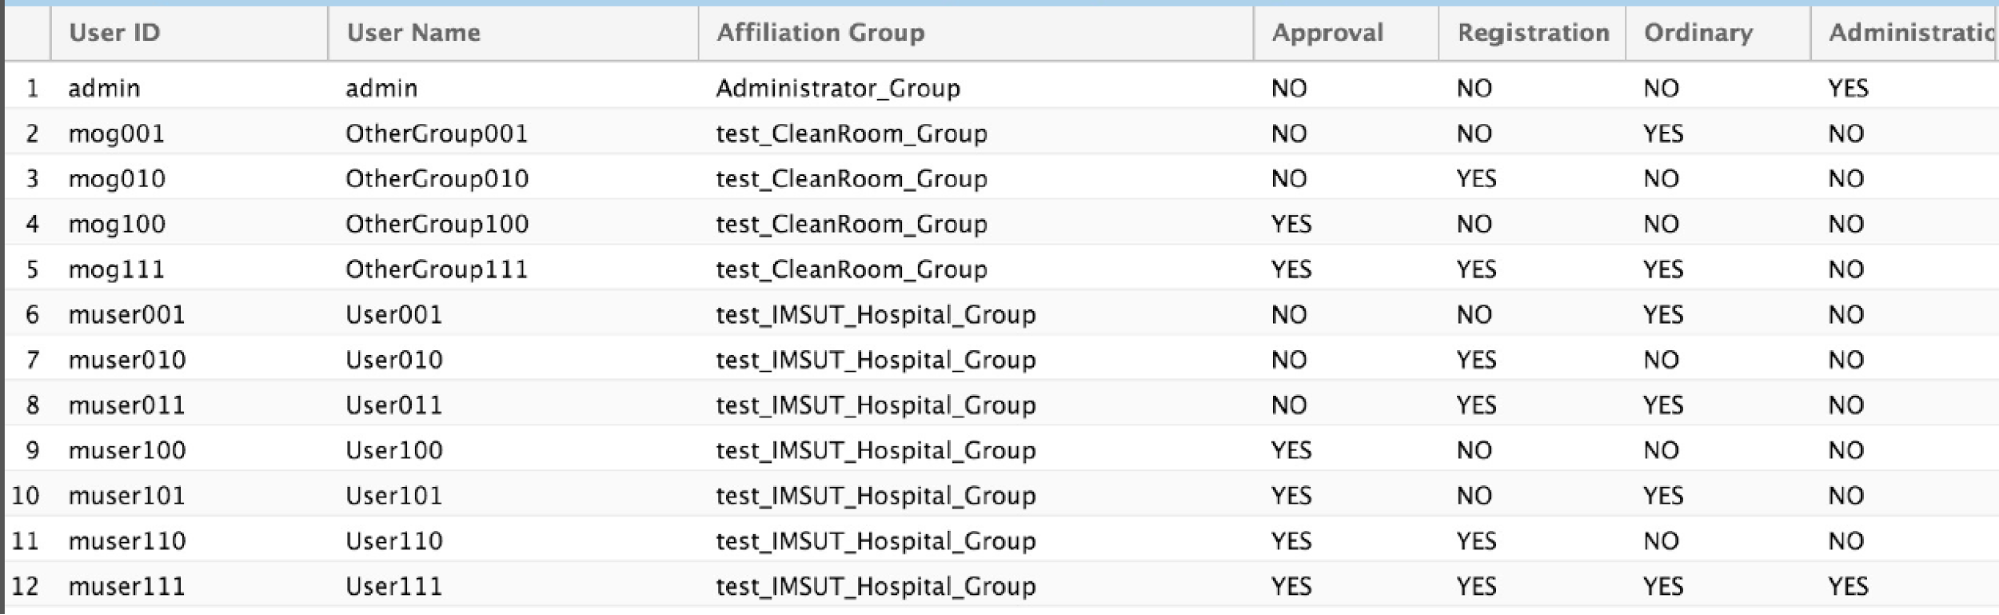
- Worker: (ID:muser001, Password:user_001)
- SOP editor: (ID:muser011, Password:user_011)
- Supervisor: (ID:muser110, Password:user_110)
- System Administrator: (ID:muser111, Password:user_111)
SOP server (for SOP editor and supervisor)
Default user accounts as sample
Document
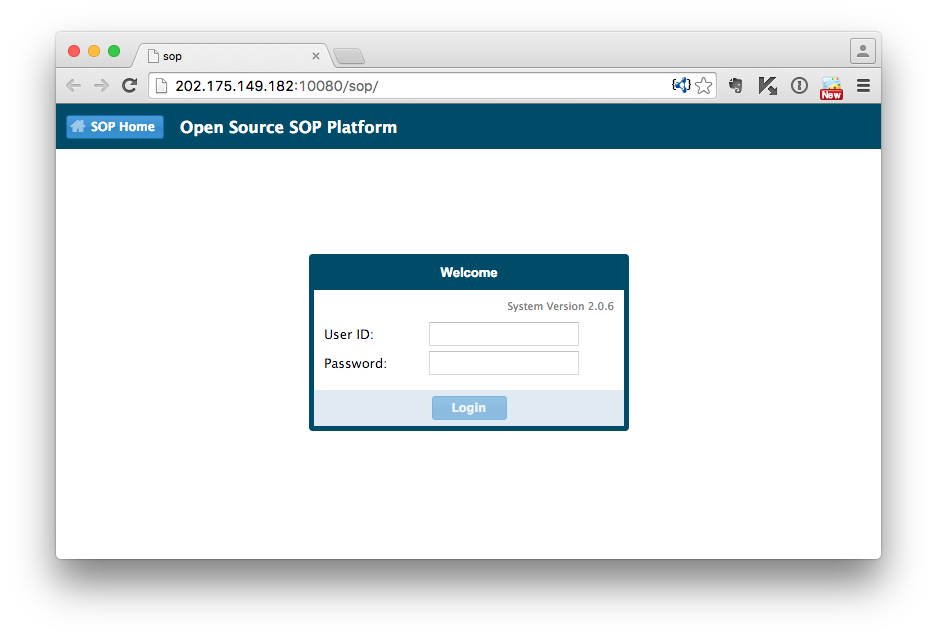
- Login to the SOP server from a login dialog using the SOP editor ID and password.
- http://DOCKER_HOST:PORT/sop/
- SOP editor: (ID:muser011, Password:user_011)
- * In this manual, we use the System Administrator account for login to each system.
- Download the three required sample files from following URLs.
Download Sample Files
- Specimen list file of SOP in the project (.txt):
- Original SOP file as Microsoft Office Word (.docx):
- SOP template image file (.sopimage):
*SOPIMAGE format (.sopimage) is our original file format that archived numbering PNG images (1.png, 2.png ...N.png) as a ZIP file without a directory.
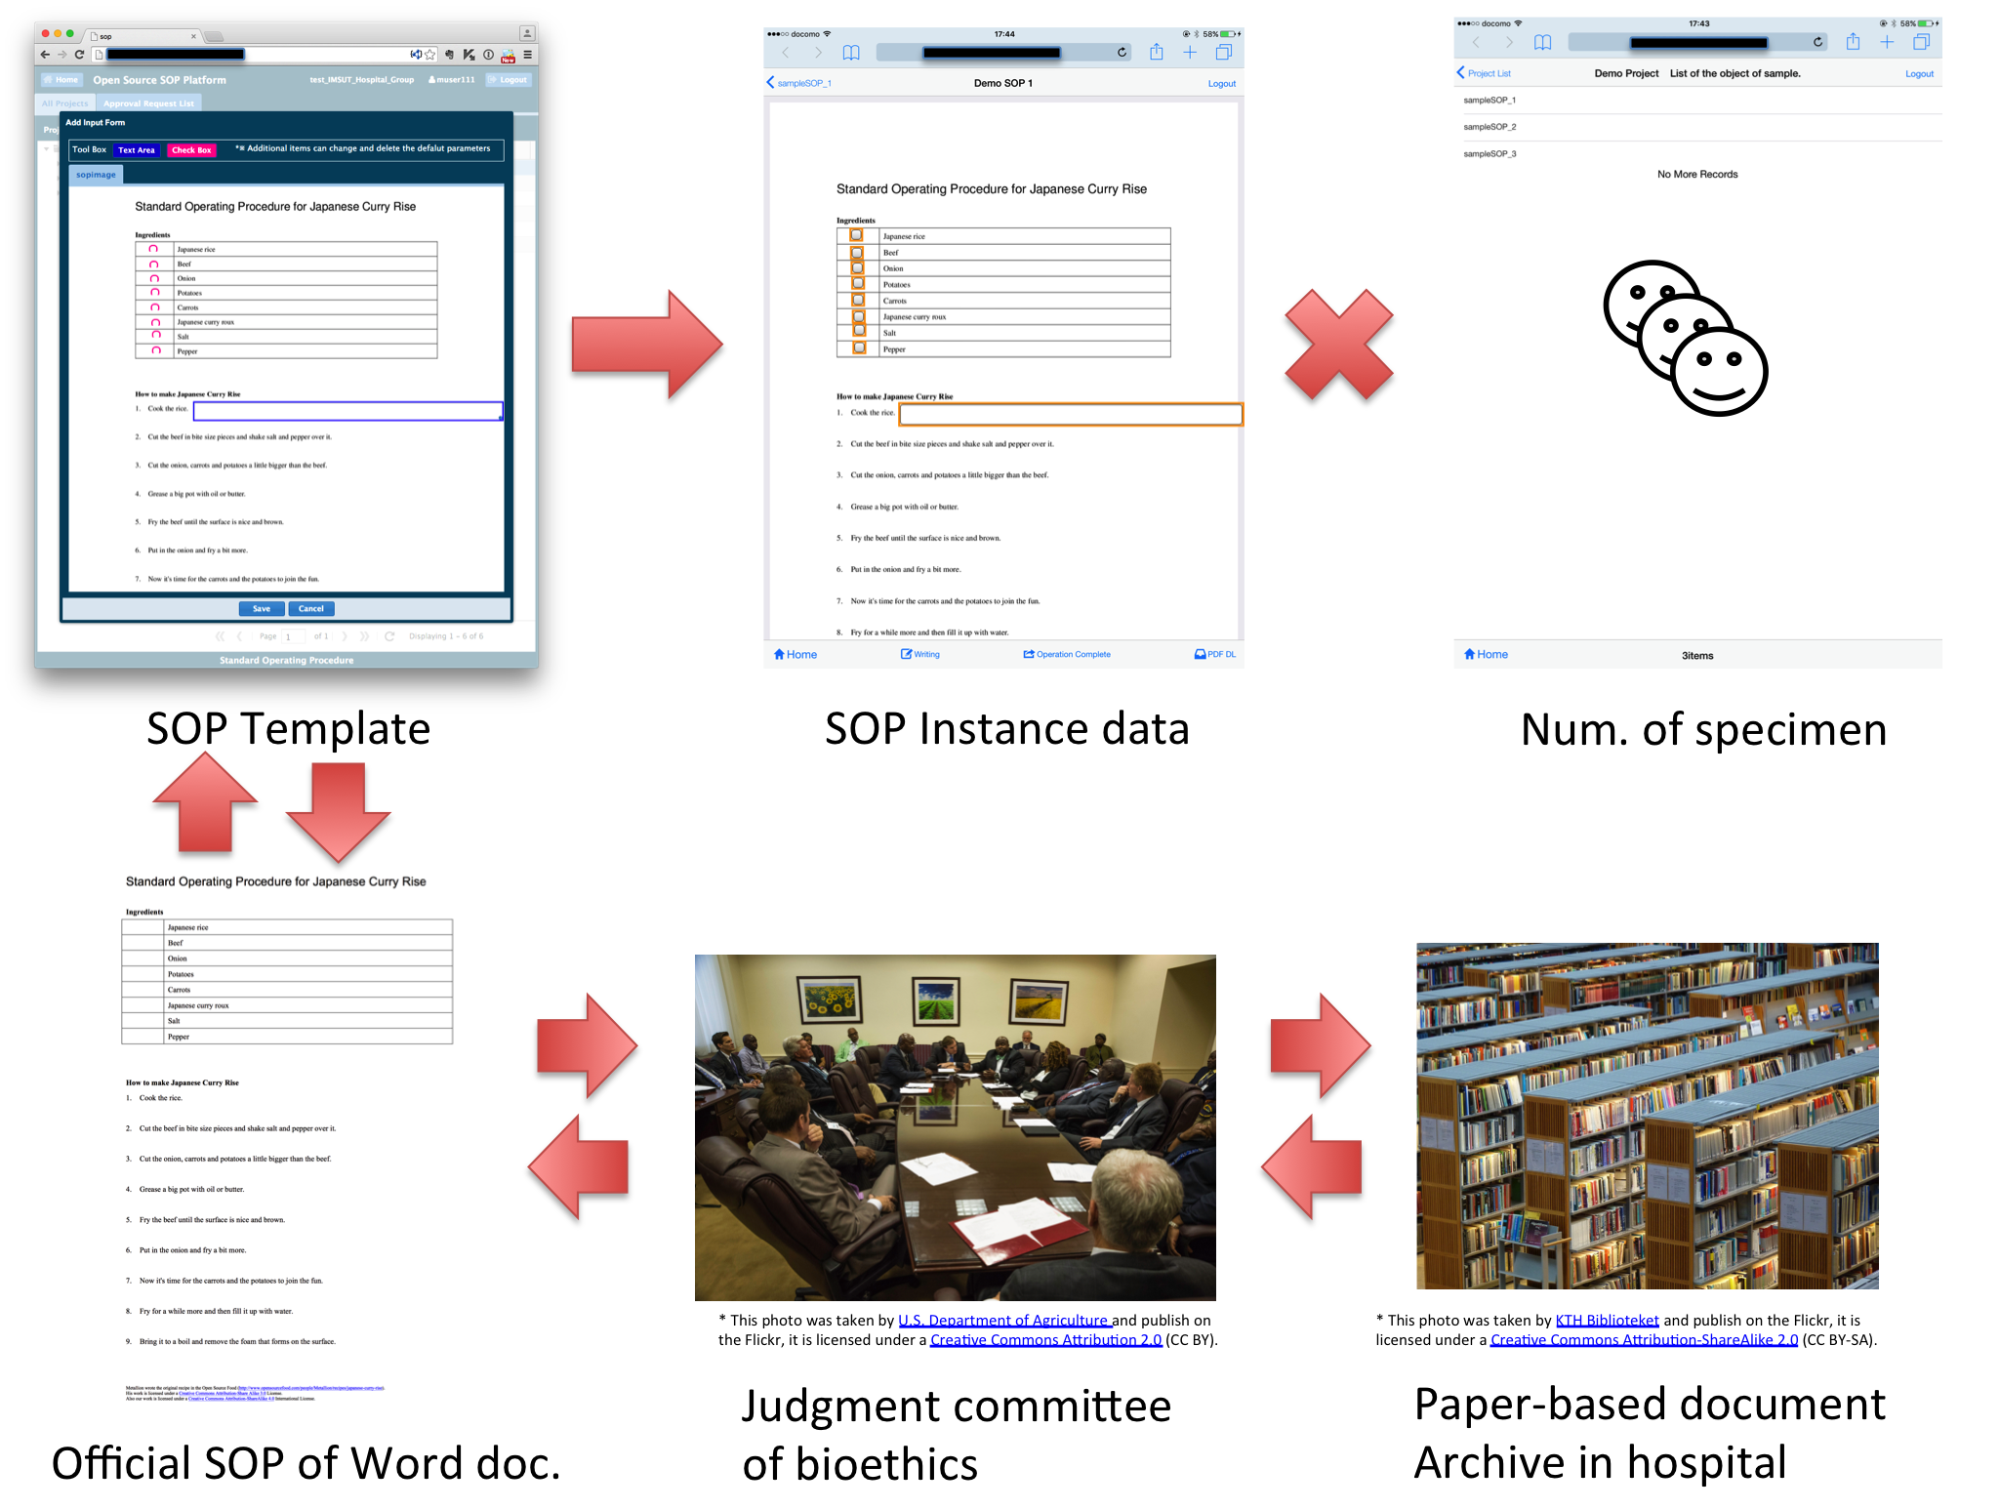
In clinical use, for example, a specimen list is written about each patient names or IDs. Original SOP file is edited for a judgment committee of bioethics as a paper medium in each hospital. SOP template image file is converted data for this SOP system from original Word file of SOP document, and it is made for a copy of an instance for each patient data toward SOP client. This way can conform to current regulations in Japanese clinical field.
- How to make a new SOPIMAGE format as an input file of SOP server?
- First, you need to convert a SOP document to PNG image (.png) from MS Word document (.doc, .docx) via PDF file (.pdf) . There is exclusive plugin tool about format converting with a virtual PDF printer such as CubePDF in MS Word on Windows. In Mac and Linux, a user can use convert command from the ImageMagick package and rename converted files to serial numbers using a shell script, for example, 1.png, 2.png … N.png (this is a case that the original SOP docucment has N pages).
- Second, SOPIMAGE format (.sopimage) is composed from PNG images in serial numbers and is archived to a ZIP file WITHOUT a directory. And, you have to rename the extension to SOPIMAGE format (.sopimage) from ZIP format (.zip).
- Software requests the input file of the same specification as Linux or Mac OS X version; especially there are useful utilities for user assist in Windows.
- First, please download and install CubePDF that is a free software of PDF-printing as a regular printer in Windows on your PC.
- CubePDF 64bit : http://www.cube-soft.jp/cubepdf/dl.php?mode=x64
- CubePDF 32bit : http://www.cube-soft.jp/cubepdf/dl.php?mode=x86
- Cube Soft (in Japanese): http://www.cube-soft.jp/cubepdf/
- Second, download the SOPtools from RegMed web page, and decompress it, and perform avance.reg before setup.exe.
- SOPtools: https://regmed.hgc.jp/download/SOPtools_1.1.0.zip
- advance.reg
- (It connects between the CubePDF and the plug-in of SOPIMAGE file converter.)
- setup.exe
- (It can enable to print directly an SOP document from printing function in Microsoft Office Word.)
- Third, execute the setup.exe after installing Microsoft .Net Framework 4.5 runtime on your Windows, also set up a property dialog on the setup program.
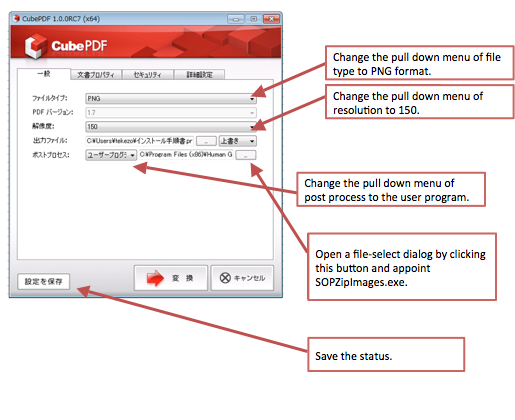
There is the SopZipimages.exe for postprocess as follows.
- Windows 32bit
C:\Program Files\Human Genome Center\SopZipImages\SopZipImages.exe
- Windows 64bit
C:\Program Files (x86)\Human Genome Center\SopZipImages\SopZipImages.exe
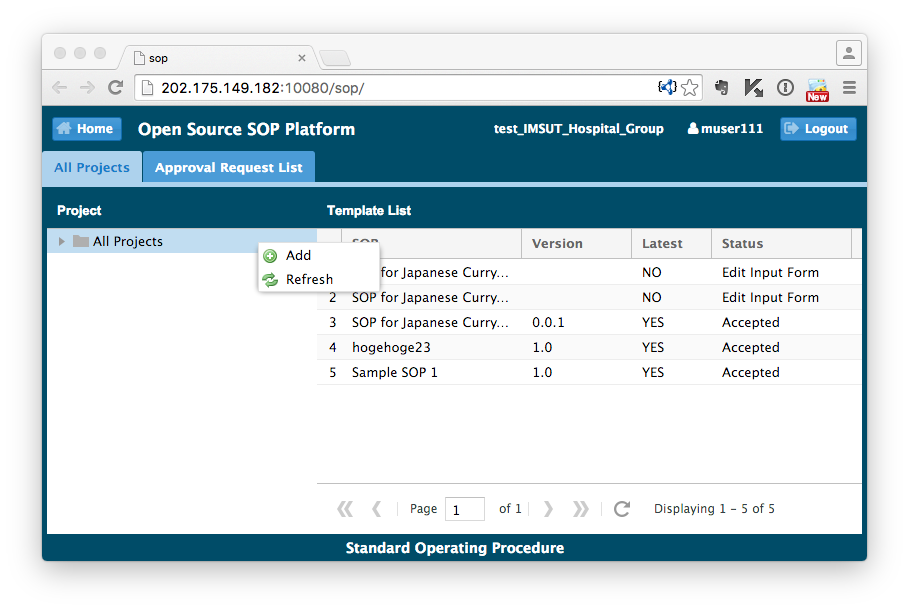
- Select the “All Projects” tab, and click a right mouse button in the left tree menu on the “All Projects” item that need to fold the tree. Also click “Add” button for a new “Project Registration.”
- Input a title for your project name, and upload the specimen list files of SOP (sampleSOP_list.txt) to the “Project layer” as SOP editor. Specimen list file is written the specimen name by line text. Please finally click “Submit” button.
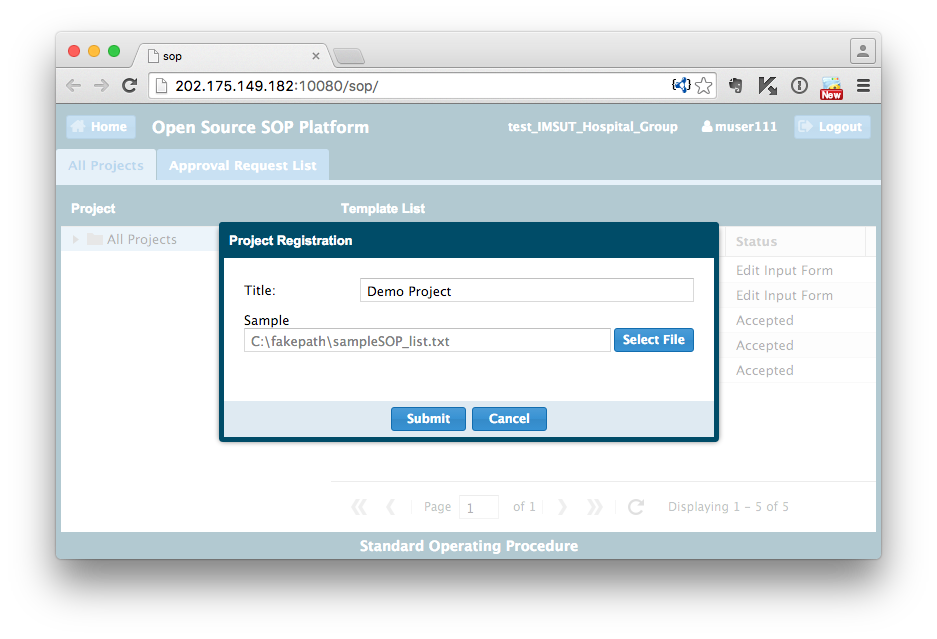
sampleSOP_list.txt
sampleSOP_1
sampleSOP_2
sampleSOP_3
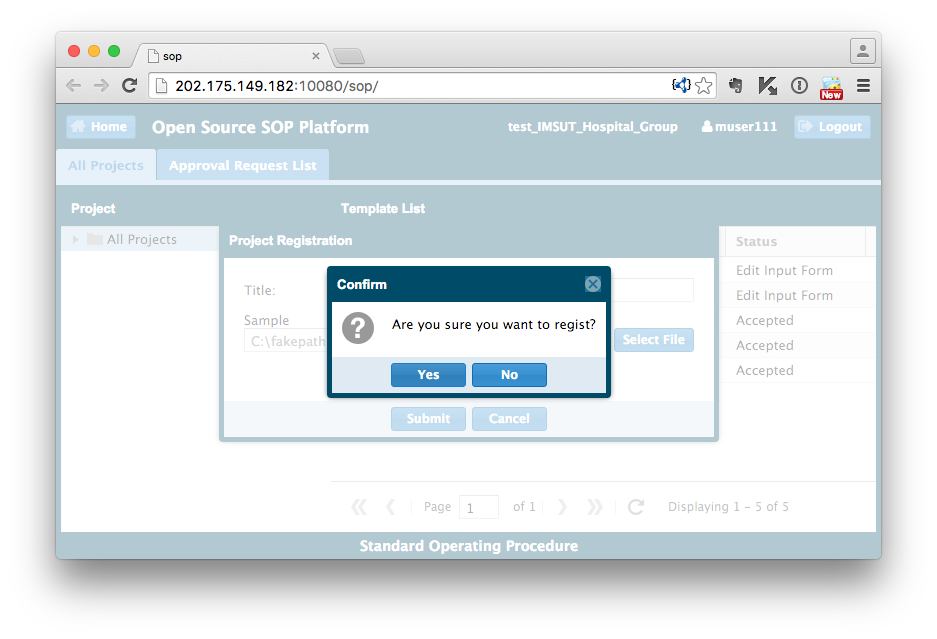
Click the “Yes” button in the “Confirm” dialog.
- Click the “Add” button on the item of your new project in tree menu.

Next, input an SOP template name into “Title” form in the SOP Registration, and if you need a double check for SOP of your project by a worker and co-worker, then you mark the checkbox in the “SOP Registration” dialog. In this tutorial, we regard the sample template as single worker’s SOP.
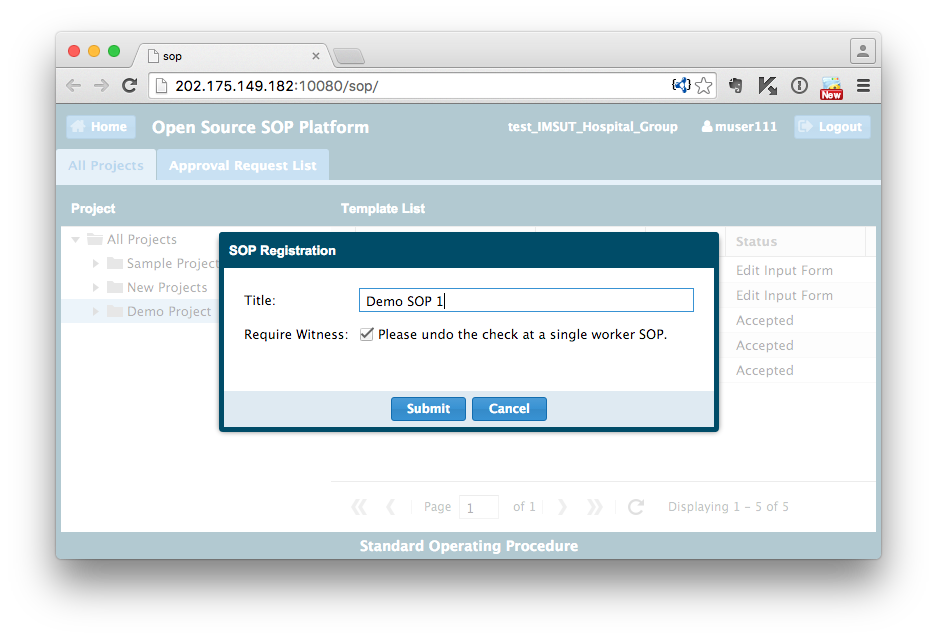
Besides, click the “Yes” button in the ”Confirm” dialog.
- Click a right button of your mouse on the item of empty SOP layer that named in the previous operation by you. And click the “Template Upload.”
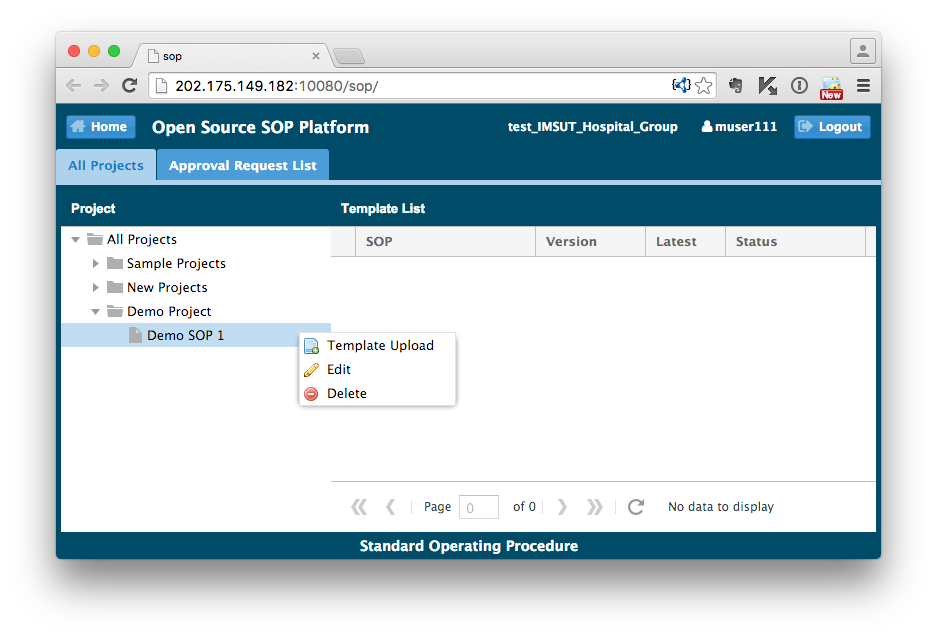
Upload the SOP template image file (sampleSOP_1.sopimage) and the Microsoft Office Word file of original SOP (sampleSOP_1.docx) to the “Sample layer” as SOP editor.
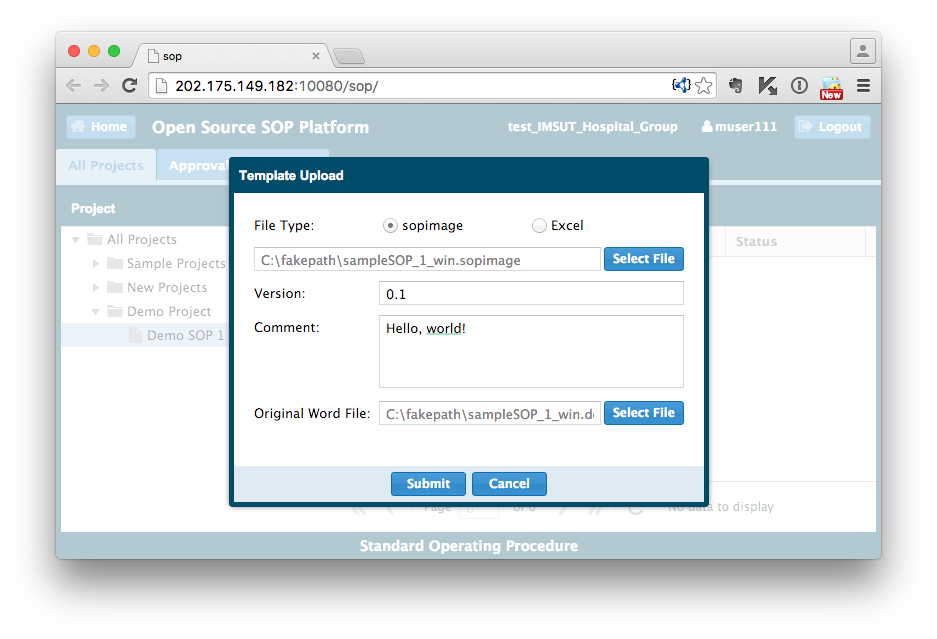
- Select a “sopimage” format in “File Type” radio button, and refer to a path of the SOP template image file (sampleSOP_1.sopimage). And input forms for the SOP document “Version” and “Comment.” Besides, select a path of the Microsoft Office Word file of original SOP (sampleSOP_1.docx). Finally, please click the “submit” button.
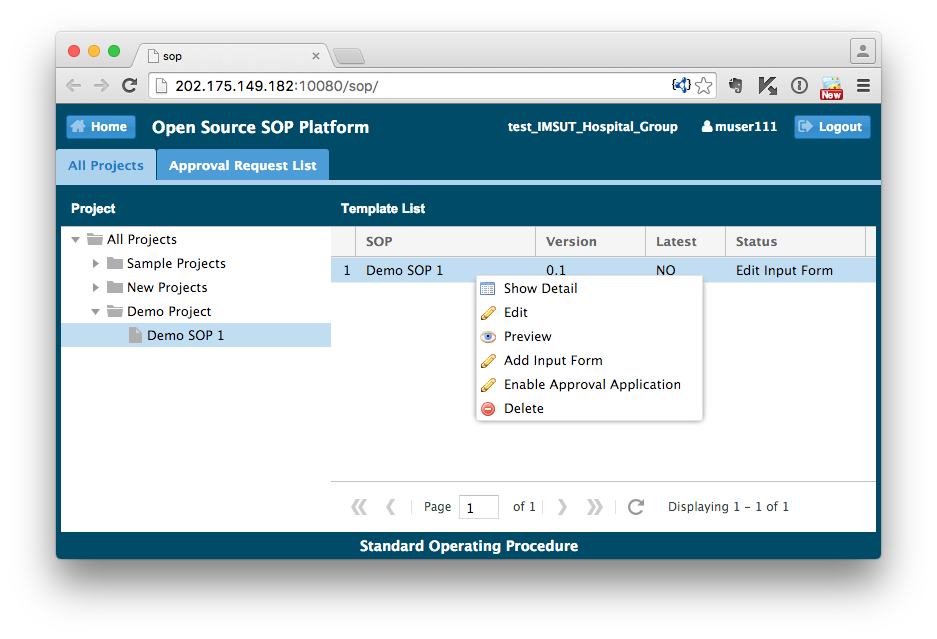
- Click a right button of your mouse on the registered item in “Template List,” and select “Add Input Form” to the uploaded files.
- Edit the uploaded SOP template in the “SOP layer” for an arrangement of tablet software by the SOP editor, and click the “Save” button.
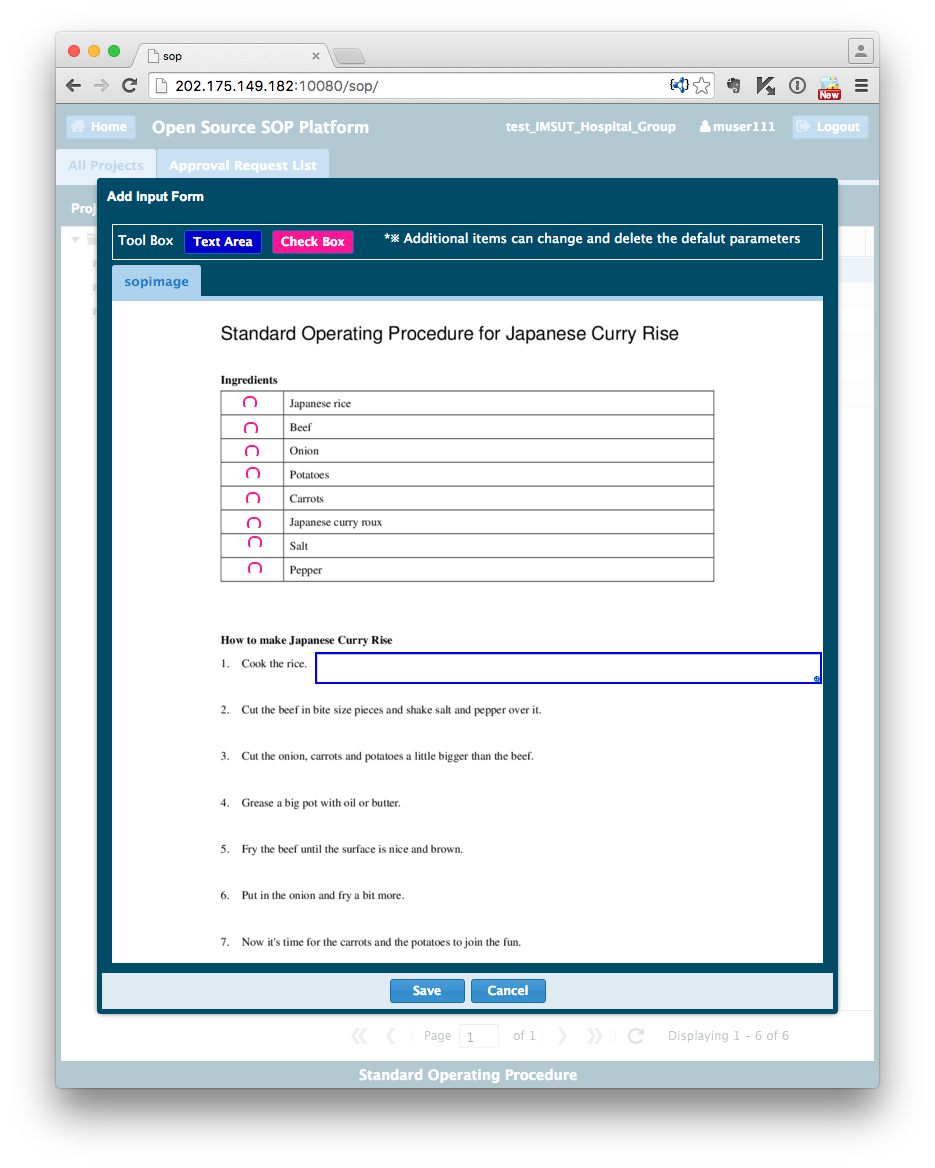
Confirm edited contents and click the “Yes” button in the “Confirm” dialog.
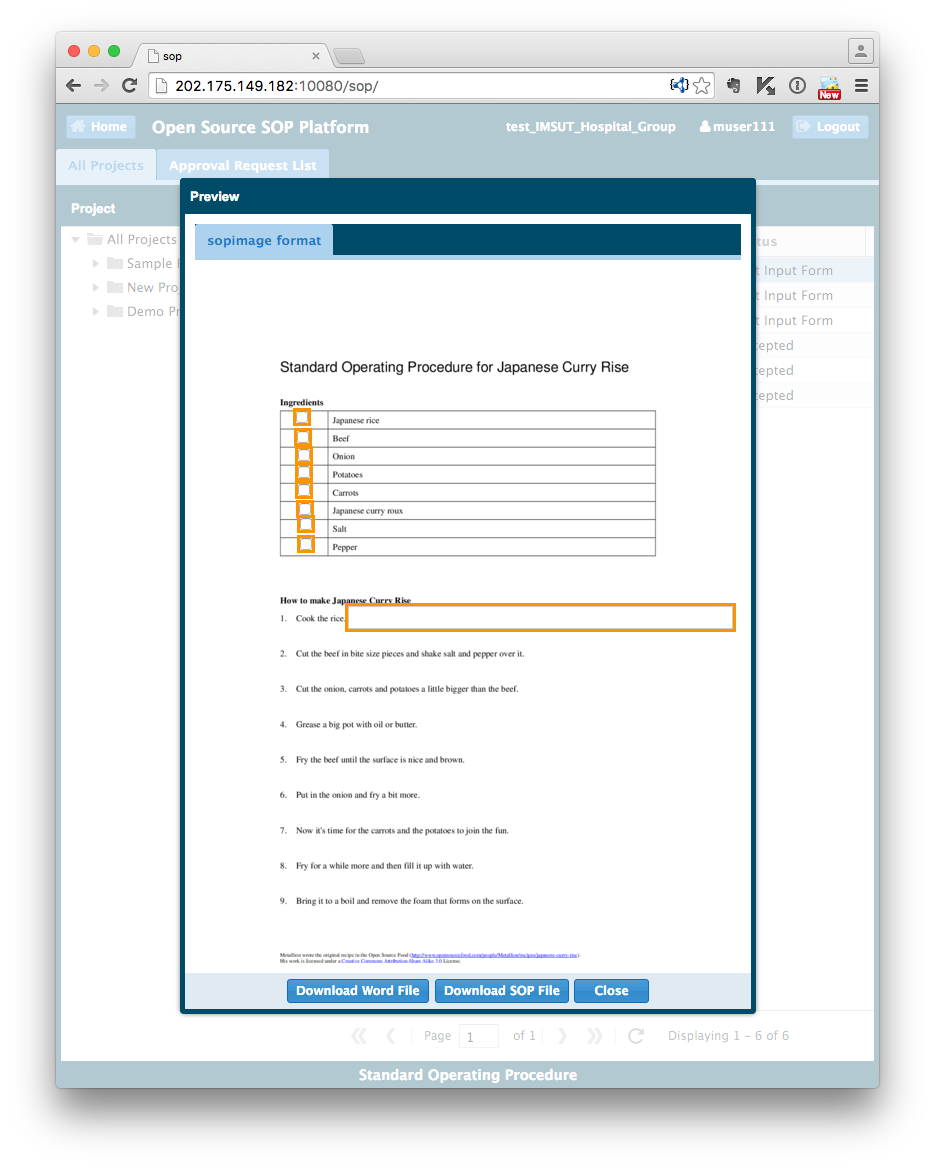
- (Option) Click a right button of your mouse on the edited item in “Template List”, and select “Preview”. This action shows a “Preview” screen in a Web browser of PC for checking the SOPIMAGE format on a tablet.
- Click a right button of your mouse on the edited item in “Template List”, and select “Enable Approval Application”. Send a request to your supervisor for approval of SOP template image file by the SOP editor.
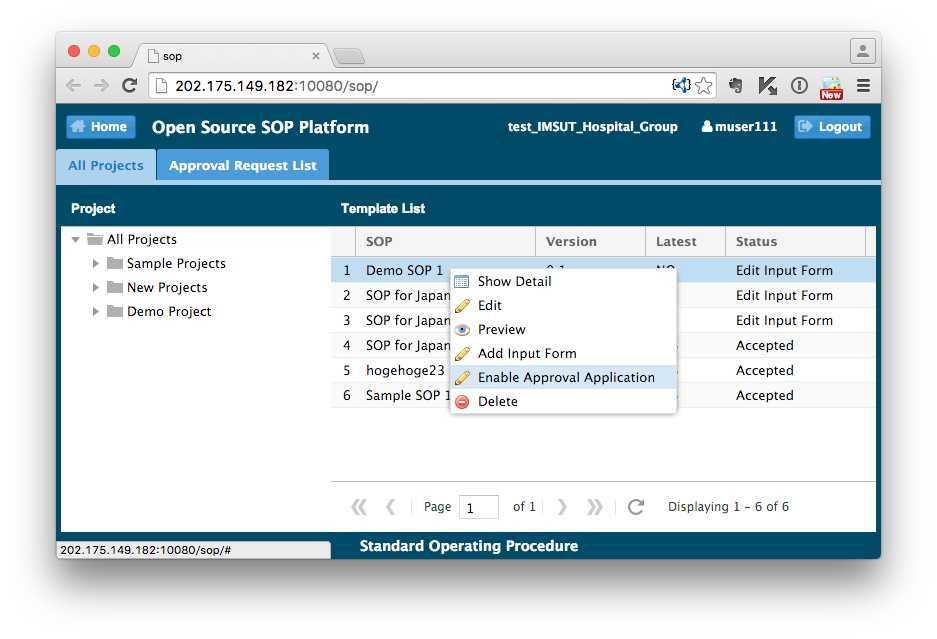
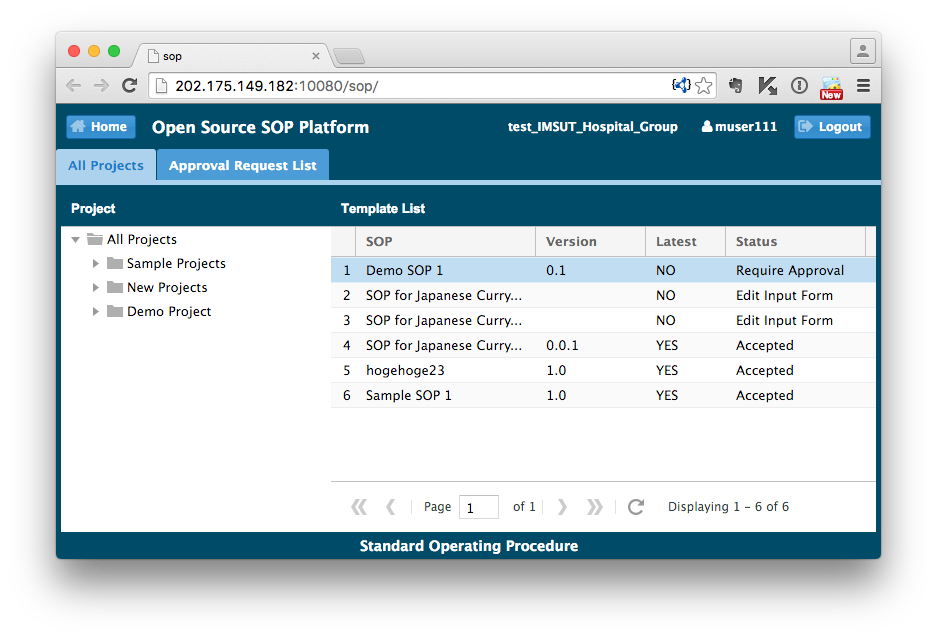
Item of the “Status” column in the “Template List” was changed to “Require Approval” state from “Edit Input Form” state.
- Logout the SOP server as a “SOP editor”, and re-login to it by “Supervisor”.
- Supervisor: (ID:muser110, Password:user_110)
- * In this manual, we use the System Administrator account for login to each system.
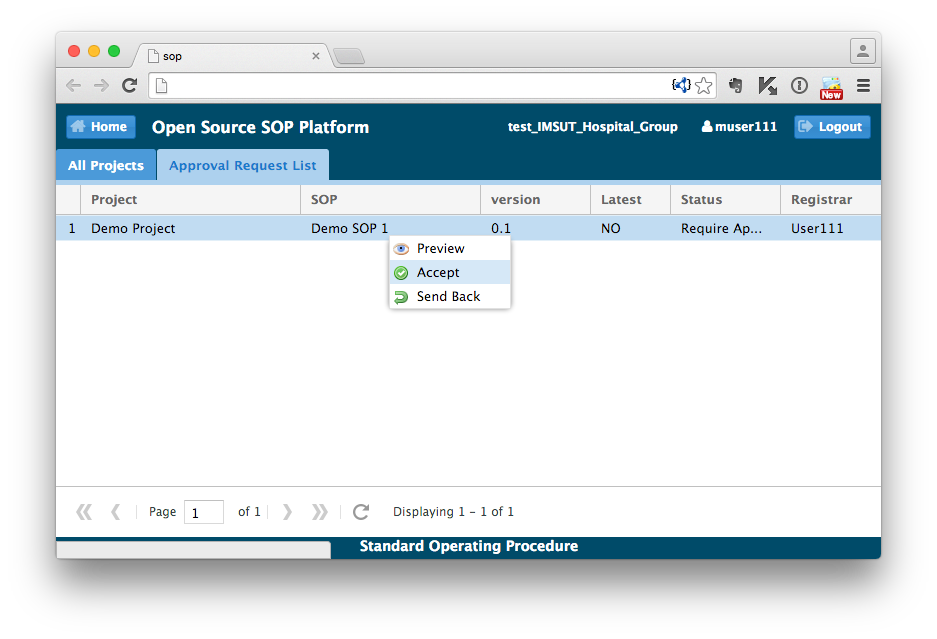
- Check and agree the requested SOP template in the “Approval Request List” tab at Supervisor. Click a right button of your mouse on the requested item in its tab, and select the “Accept” or “Send Back” button after confirming the “Preview” screen.
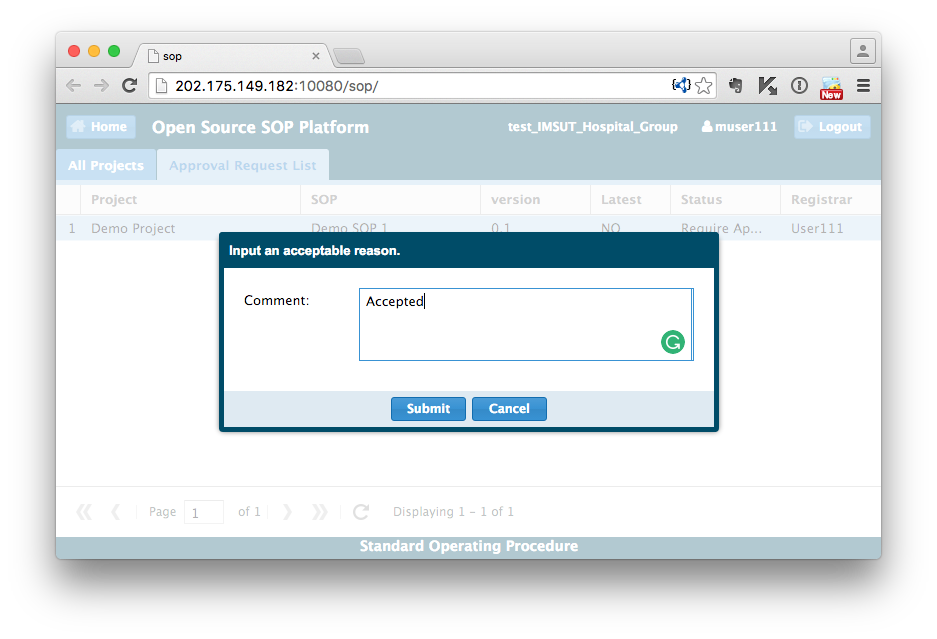
Write a comment on the “Comment” form about an acceptable reason, and click the “Submit” button.
- Logout the SOP server as the “Supervisor”, and re-login to it by the “SOP editor”.
- SOP editor: (ID:muser011, Password:user_011)
- * In this manual, we use the System Administrator account for login to each system.
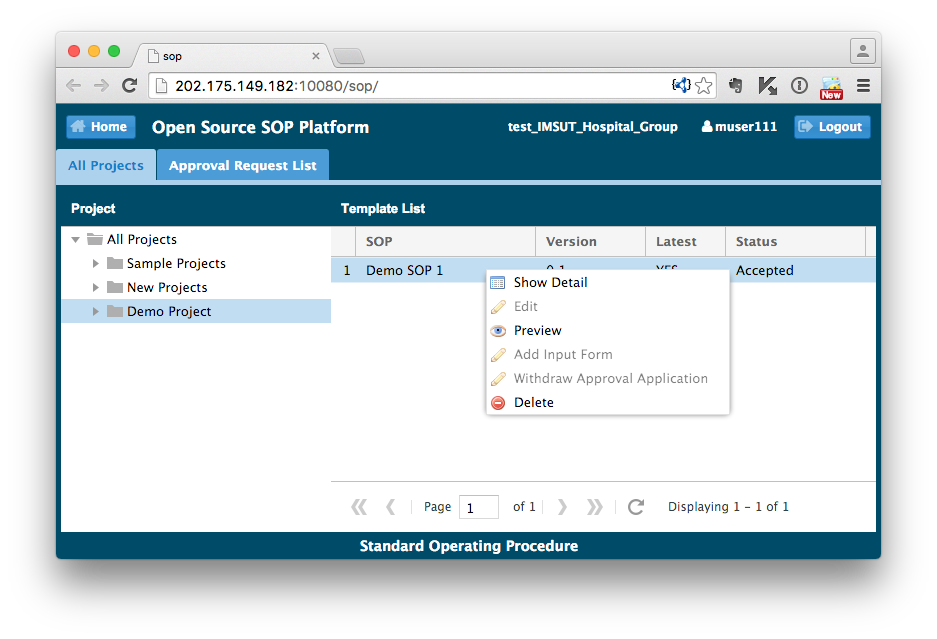
- Item of the “Status” column in the “Template List” was changed to “Accepted” state from “Require Approval” state at “SOP editor.” In “Accepted” state, editable functions are disabled when you click a right button of your mouse on the edited item in “Template List.”
- Logout the SOP server as the “SOP editor.”
SOP client (for worker in clean room)
- Let’s assume that you are working for an experiment in a clean room.

* This photo was taken by Andrew Evans and publish on the Flickr, it is licensed under a Creative Commons Attribution 2.0 (CC BY).
- Access to the SOP client via Web browser application in iPad as a worker. (We verified to work normally in Safari.) Login to the SOP client from a login dialog using the “Worker” ID and password.
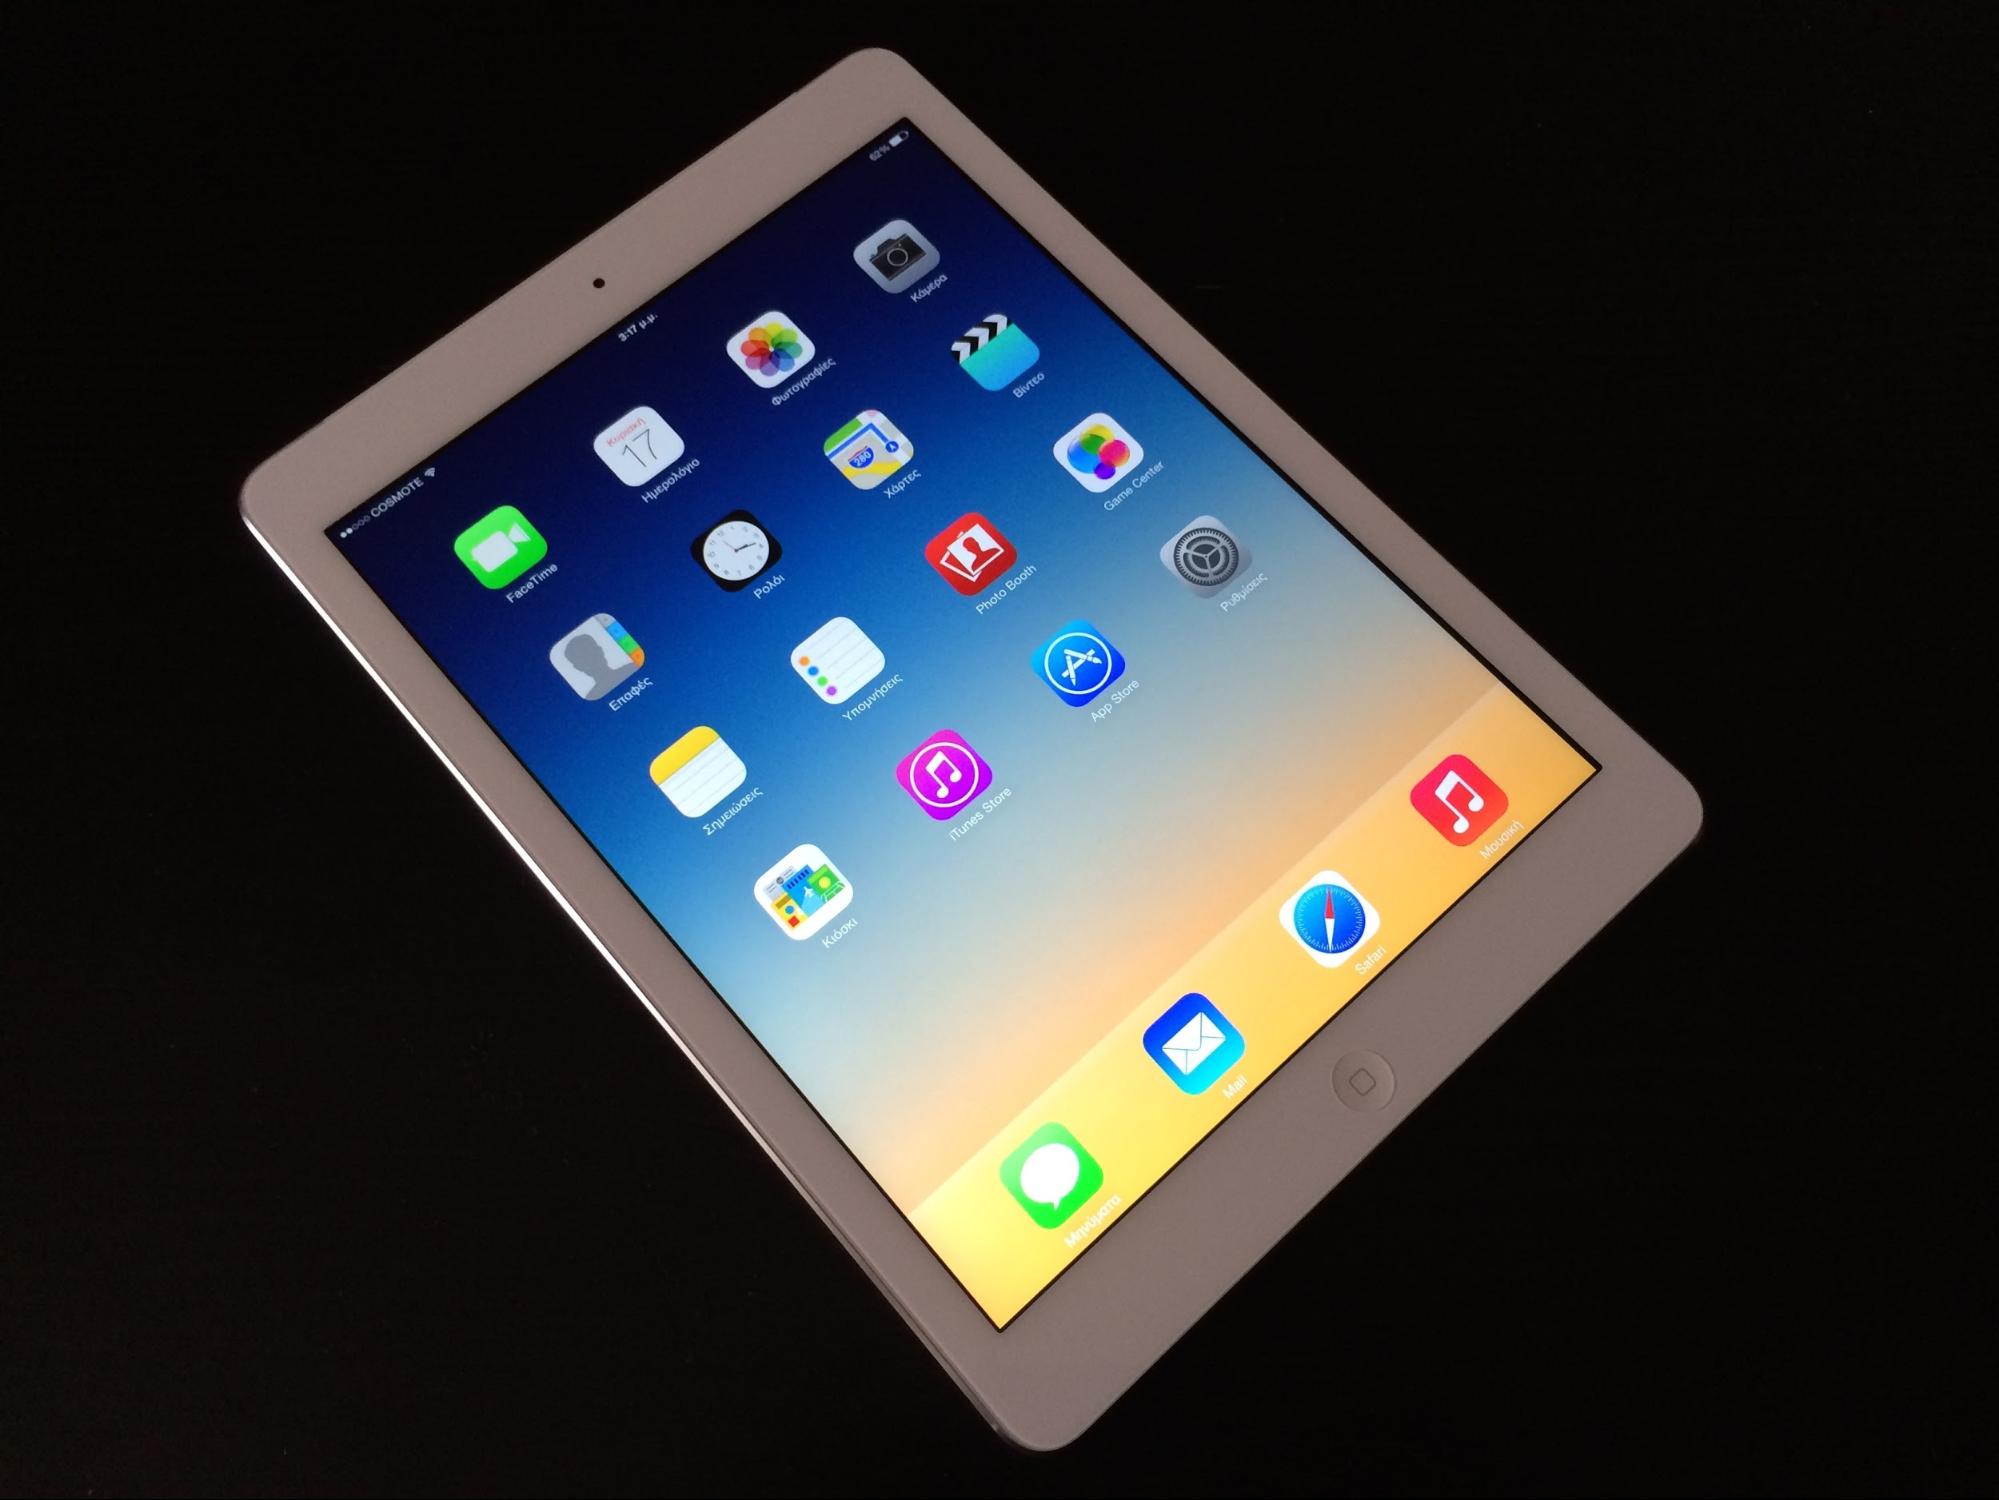
* This photo was taken by John Karakatsanis and publish on the Flickr, it is licensed under a Creative Commons Attribution-ShareAlike 2.0 (CC BY-SA).
- http://DOCKER_HOST:PORT/sop/tablet/
- Worker: (ID:muser001, Password:user_001)
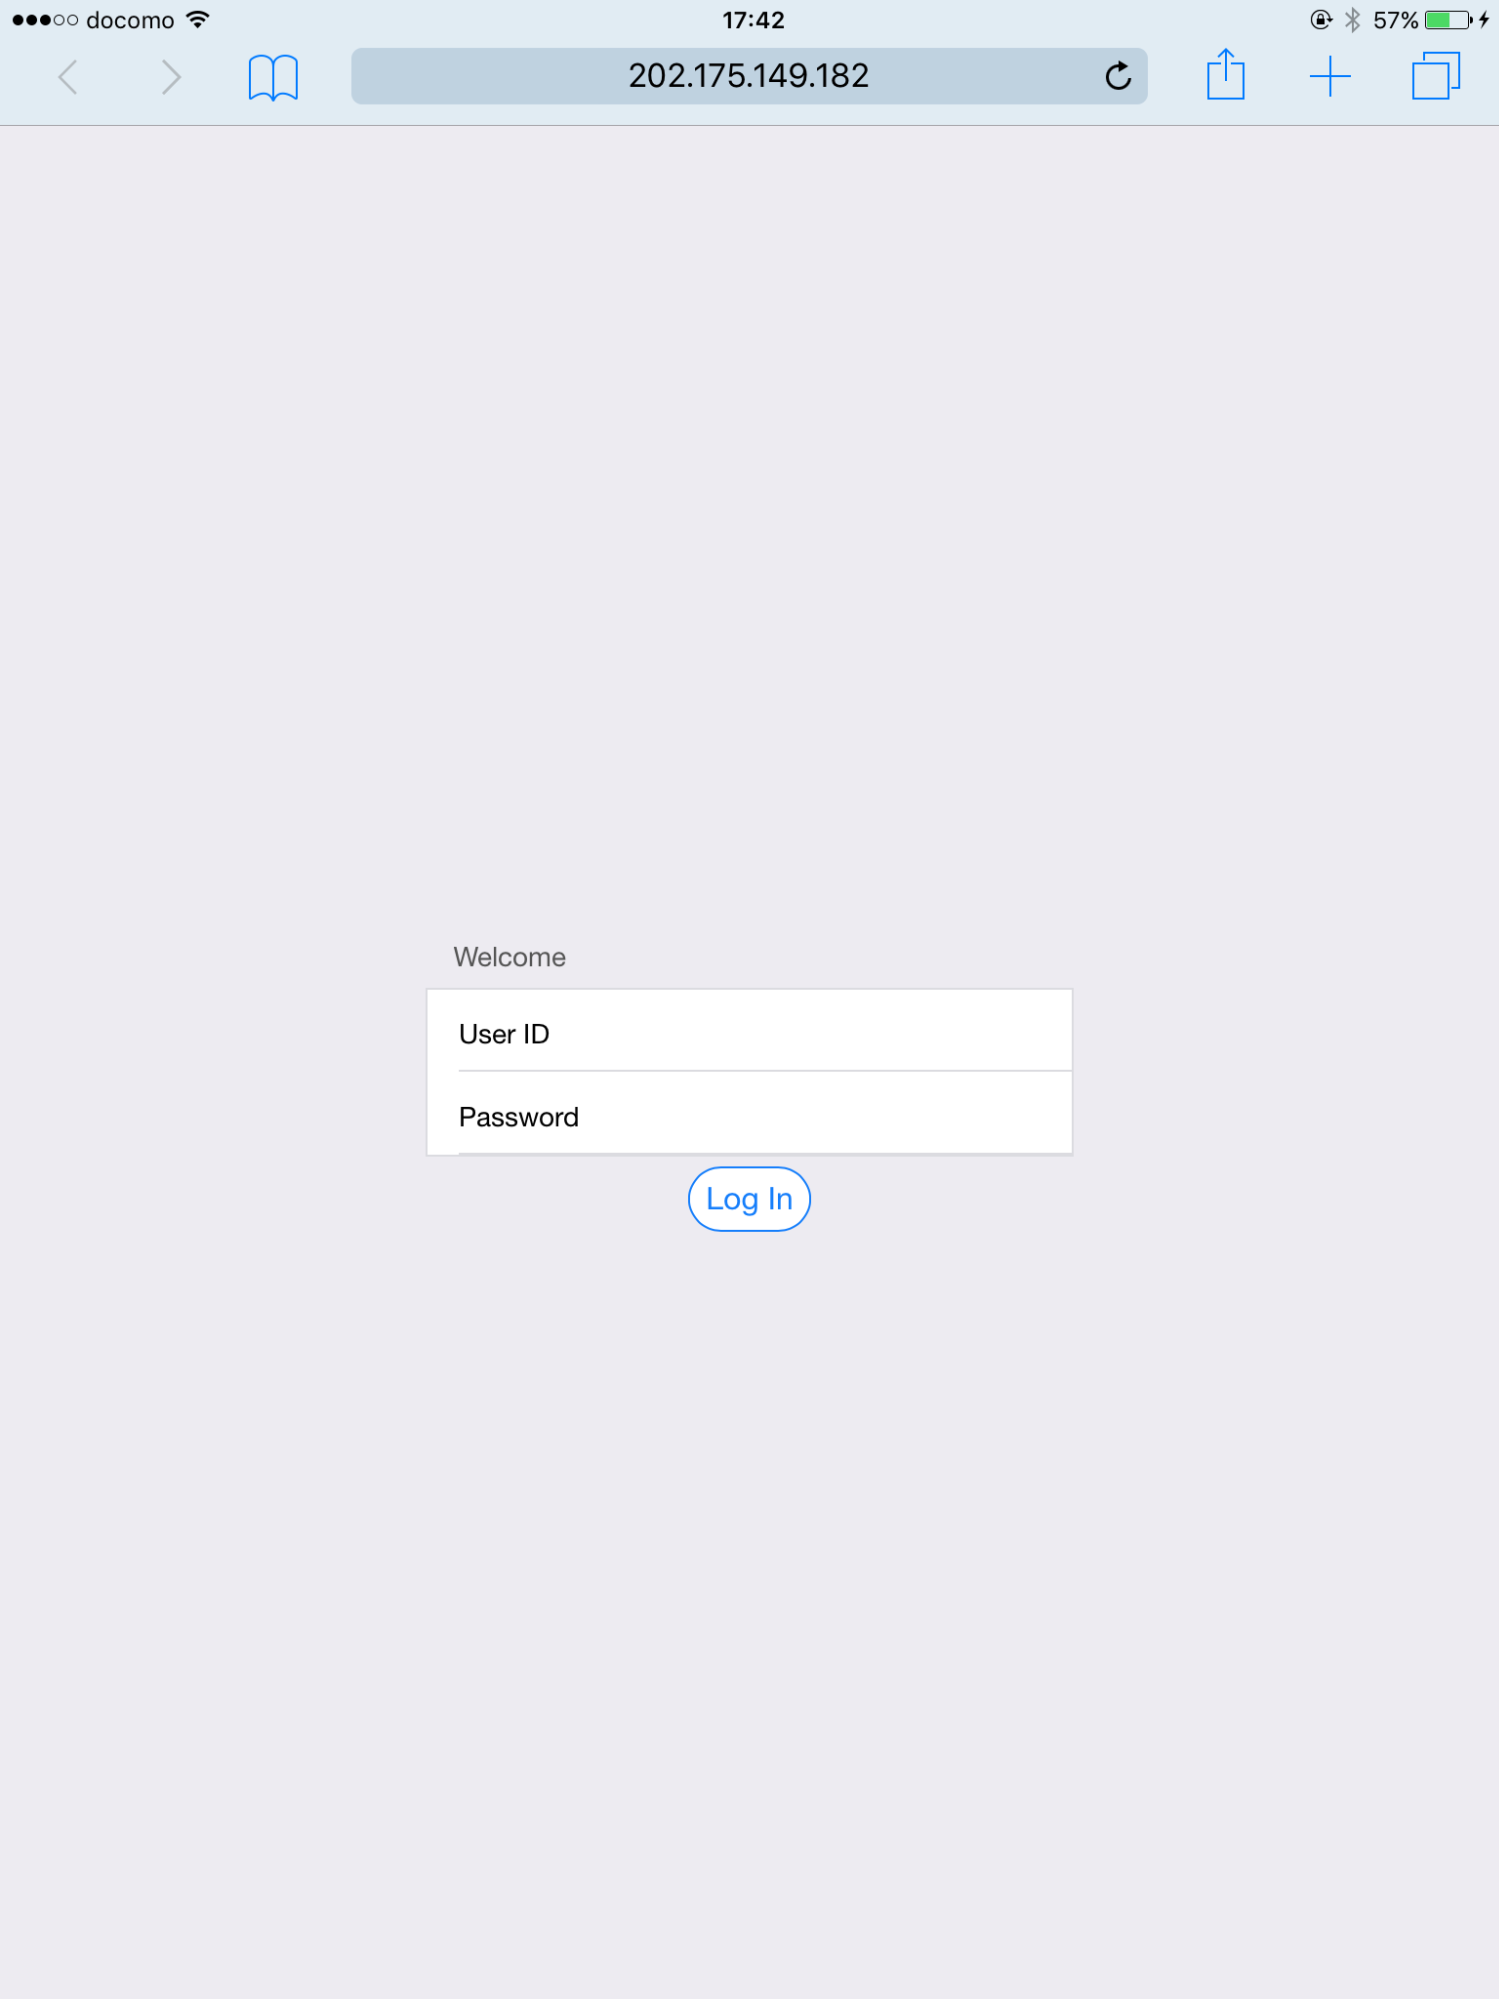
Login screen of the SOP client
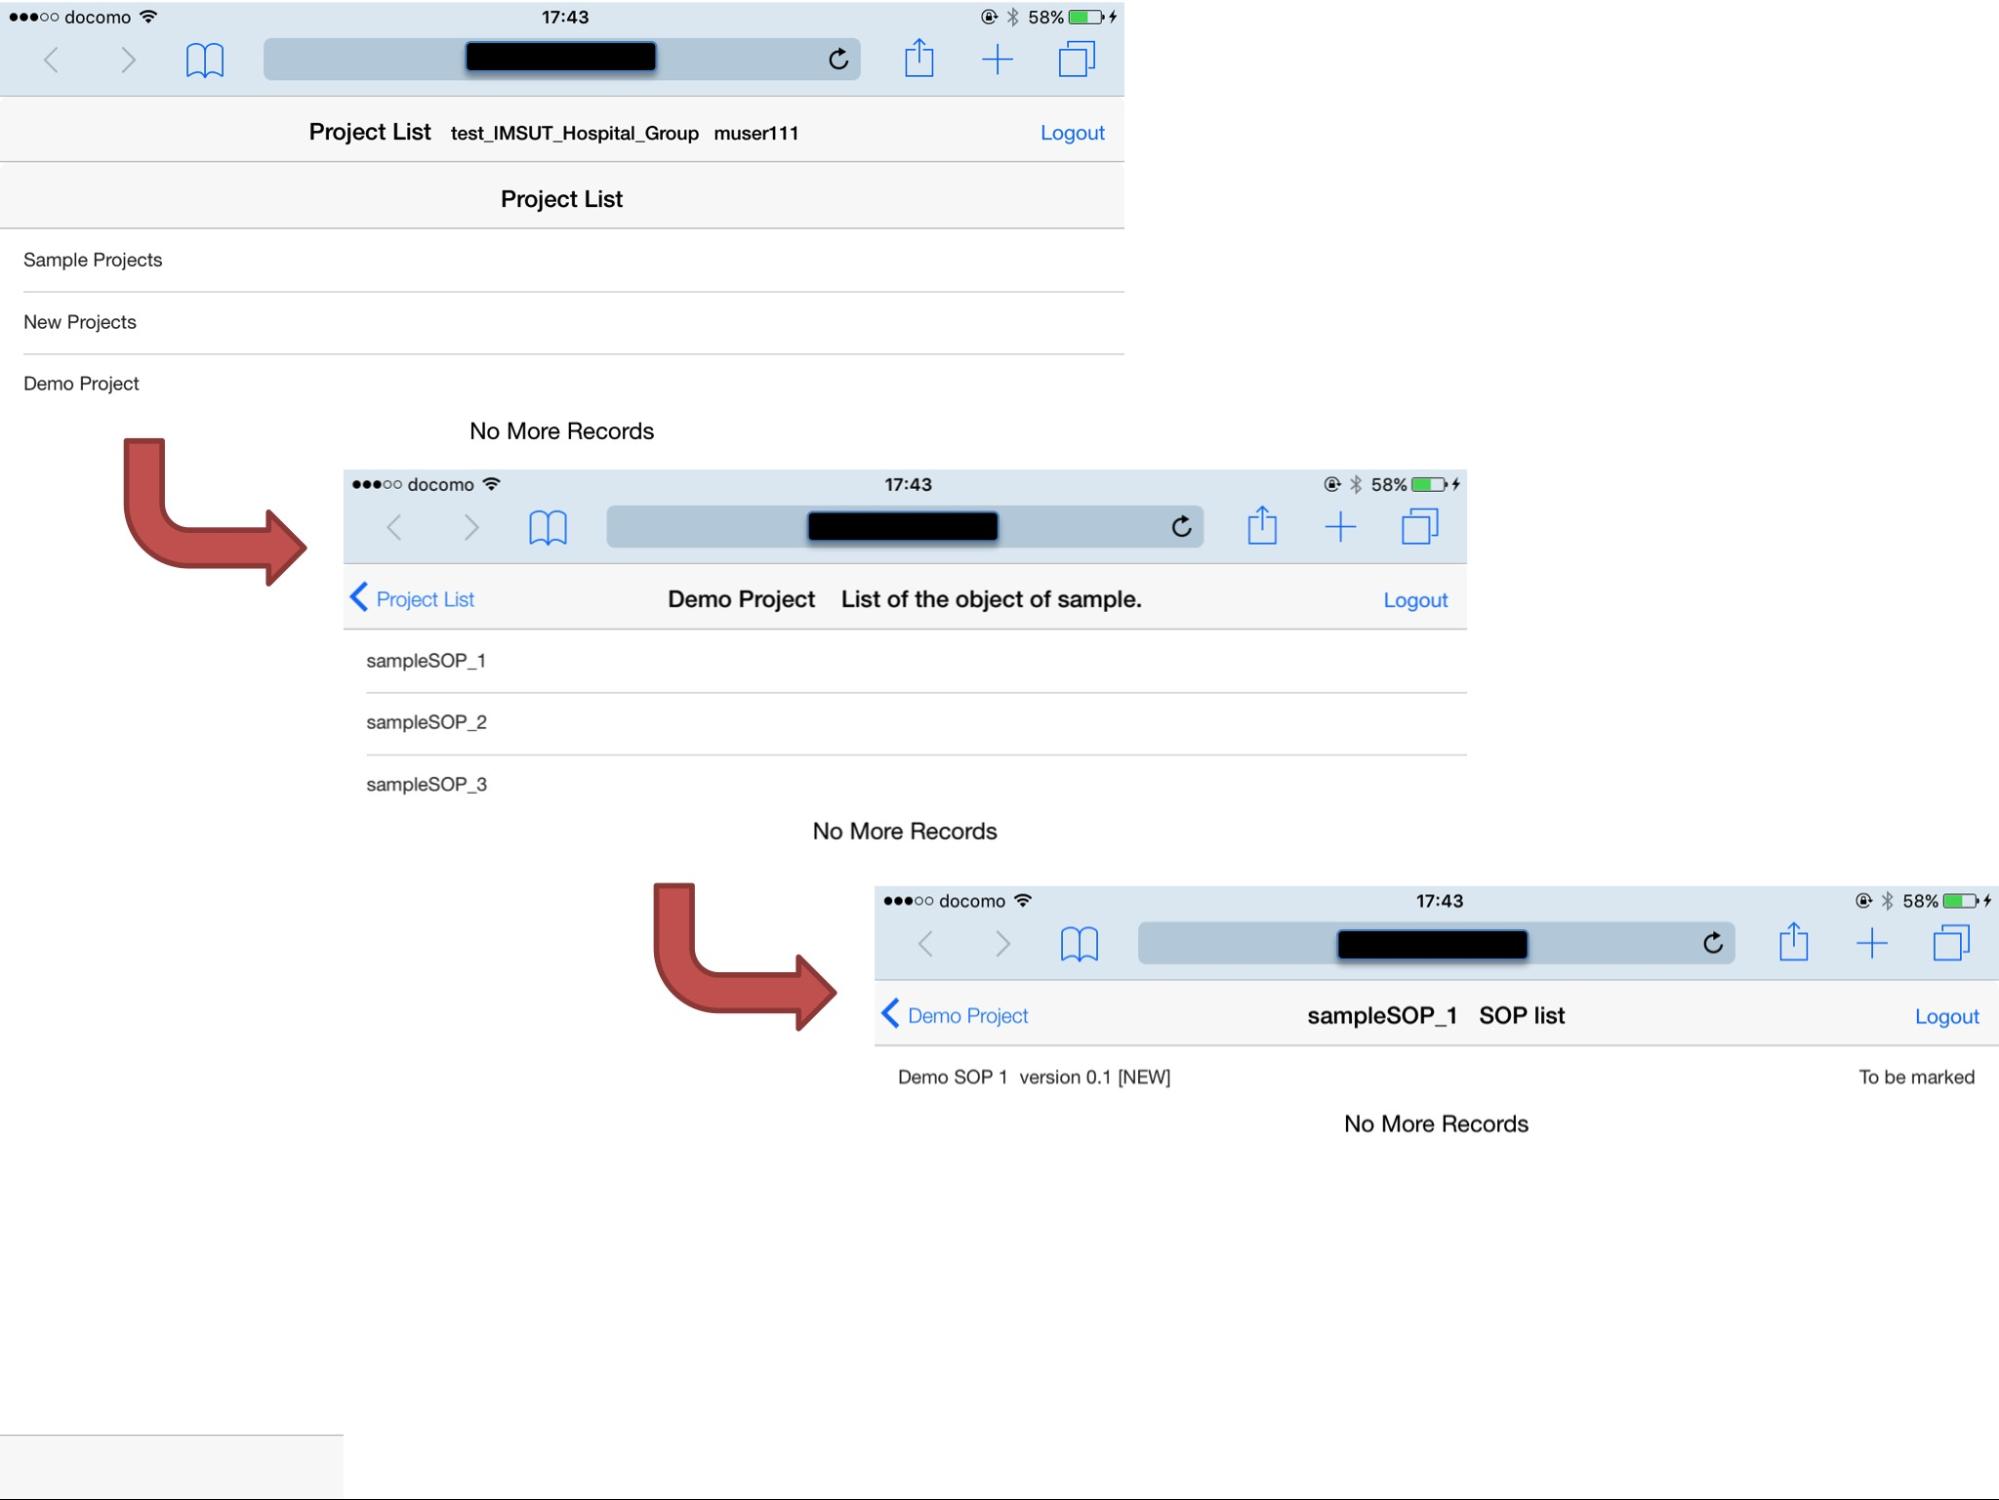
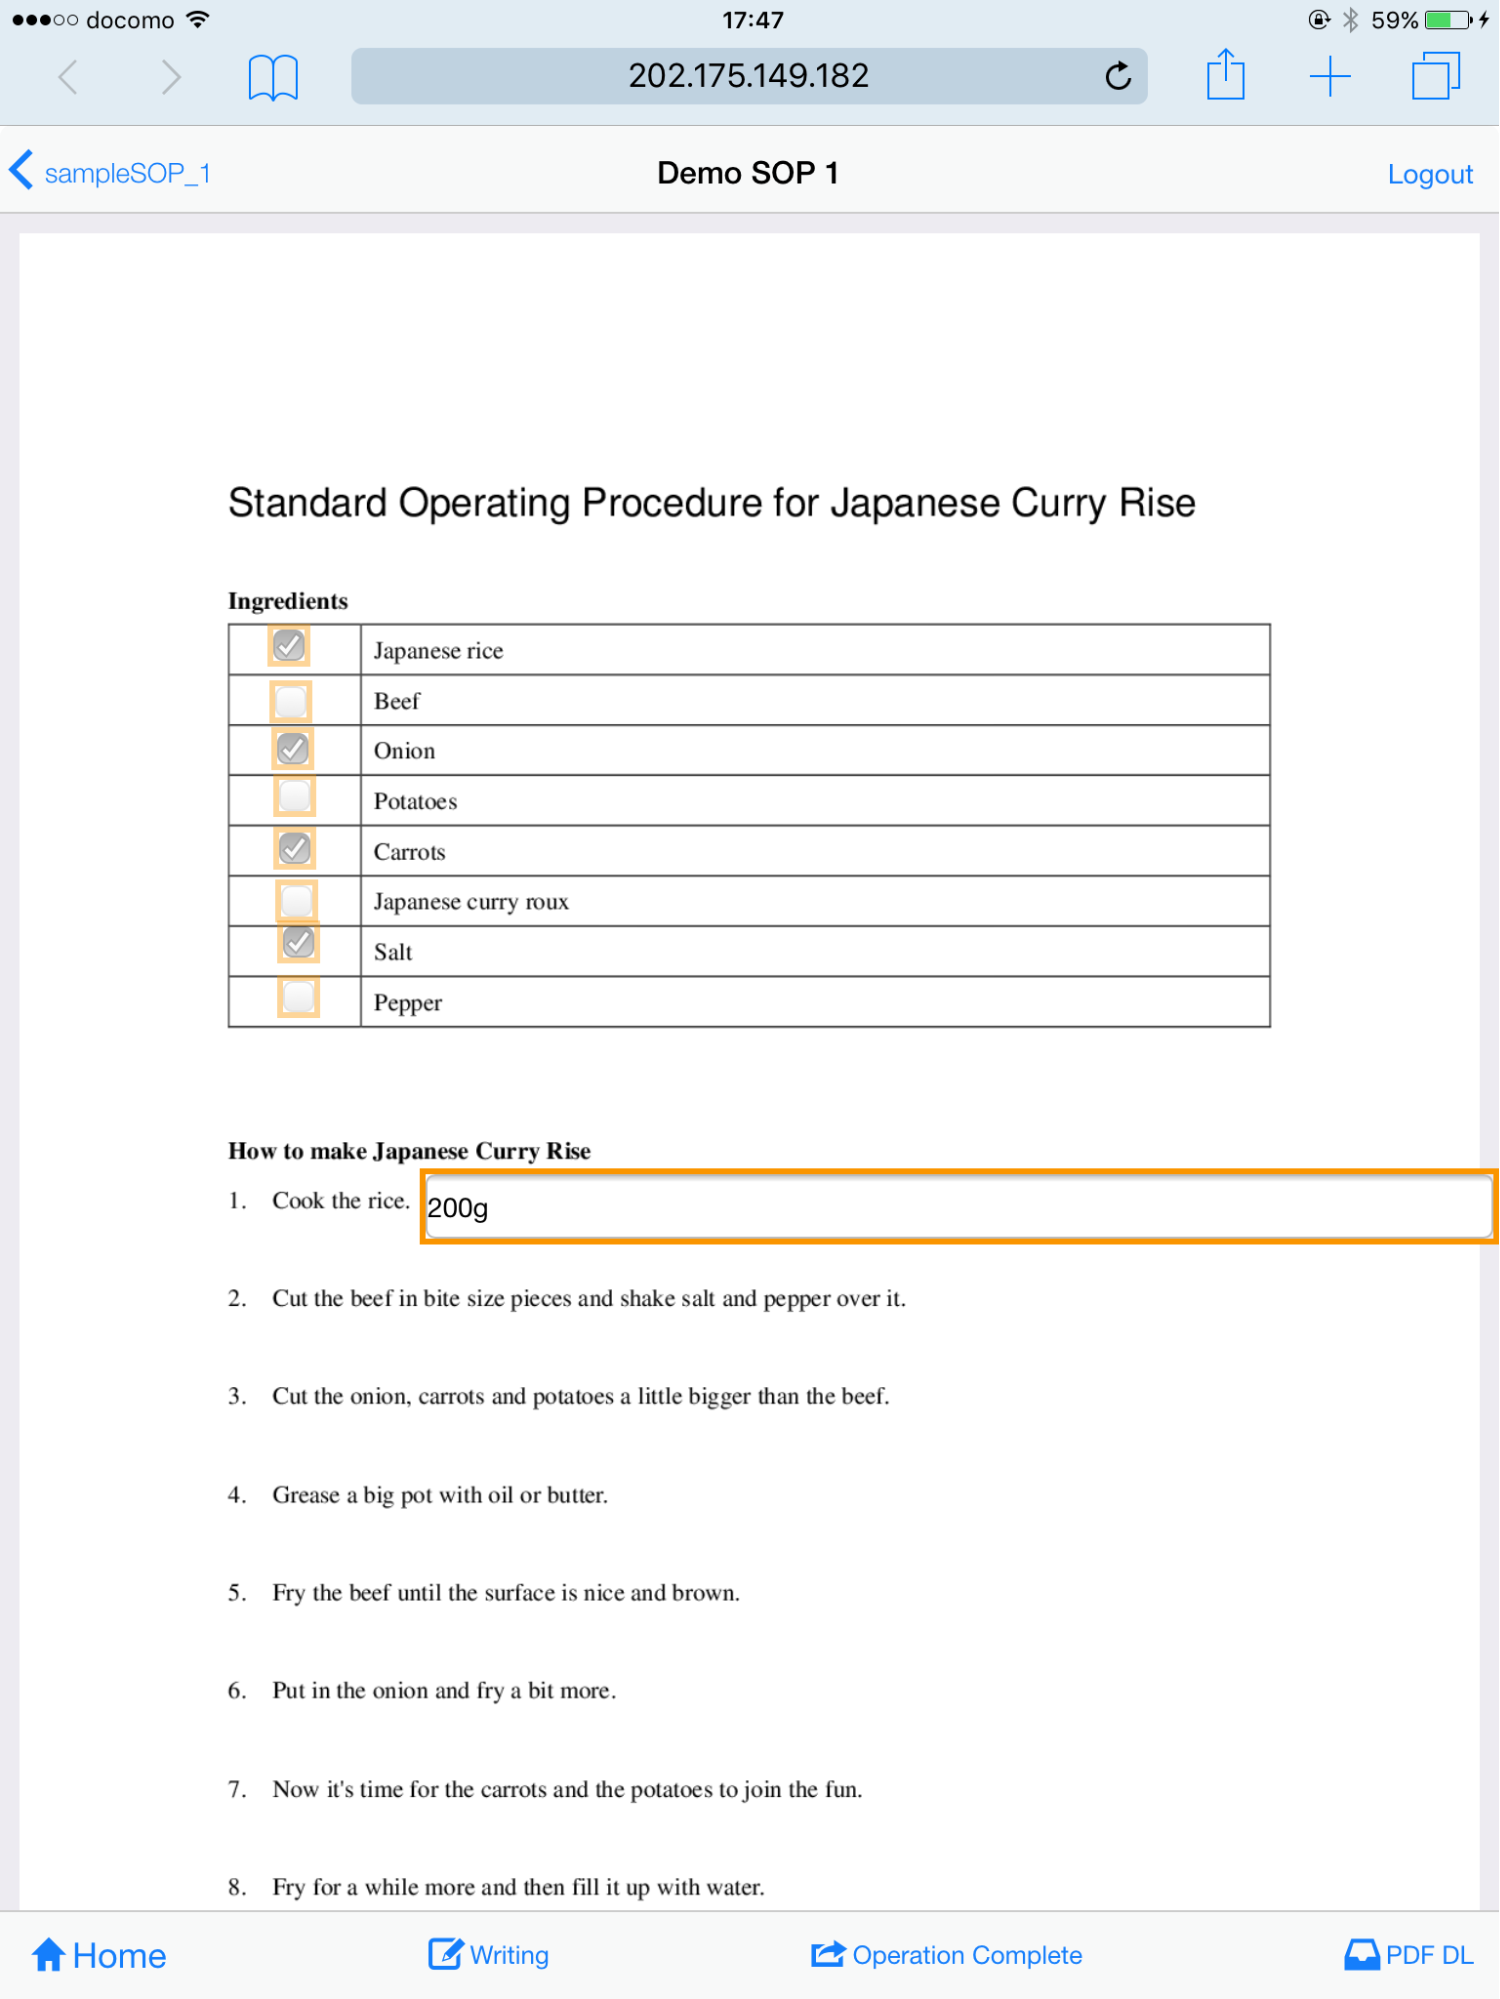
- Select a registered the SOP instance from the “Project List > Sample List > SOP instance.”
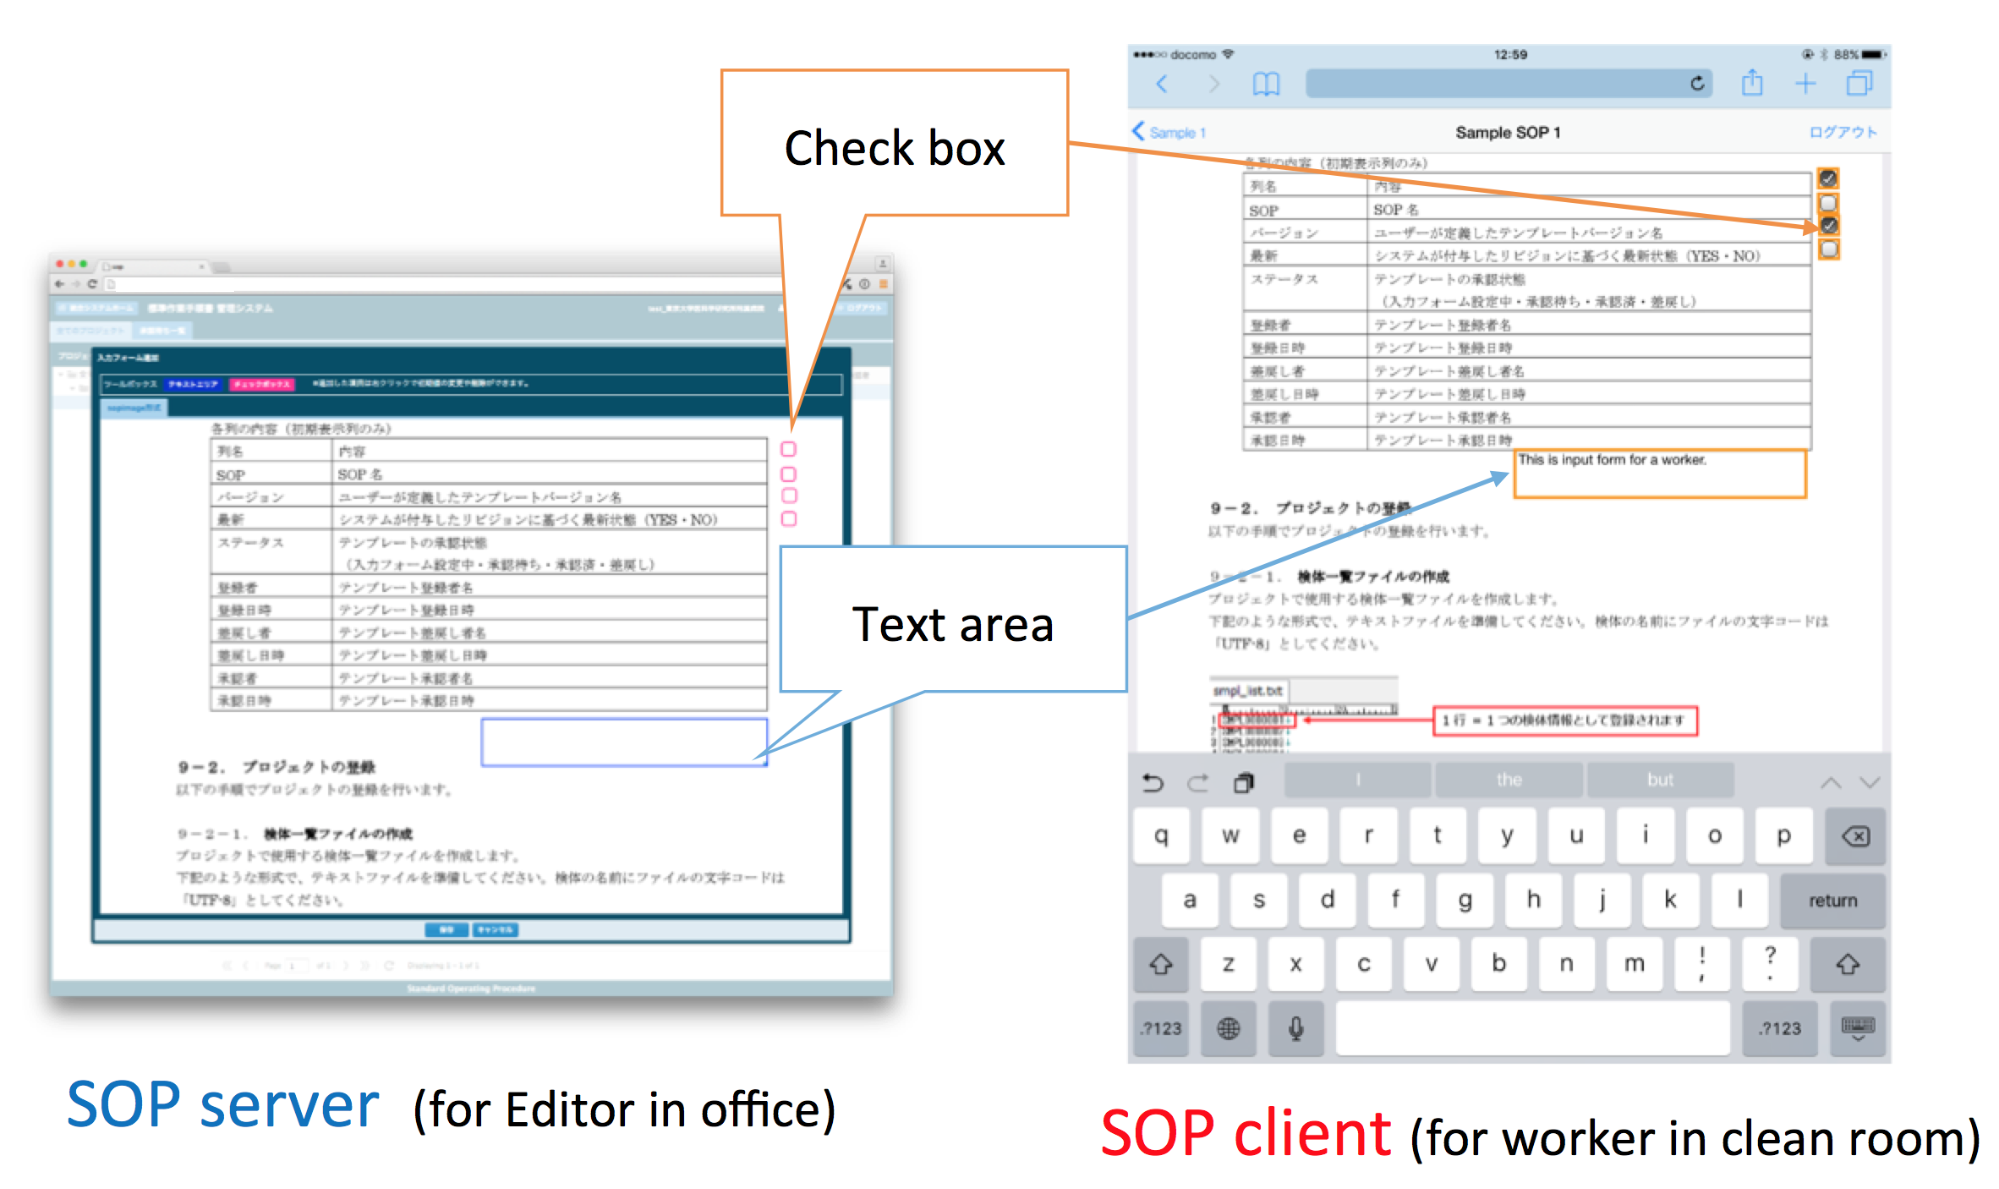
- Open a registered SOP instance data in the sample from an item of “SOP instance.” Orange square is operable areas that designated operation in an experiment by “Supervisor”. This demonstration focuses mainly on a checkbox and text area.
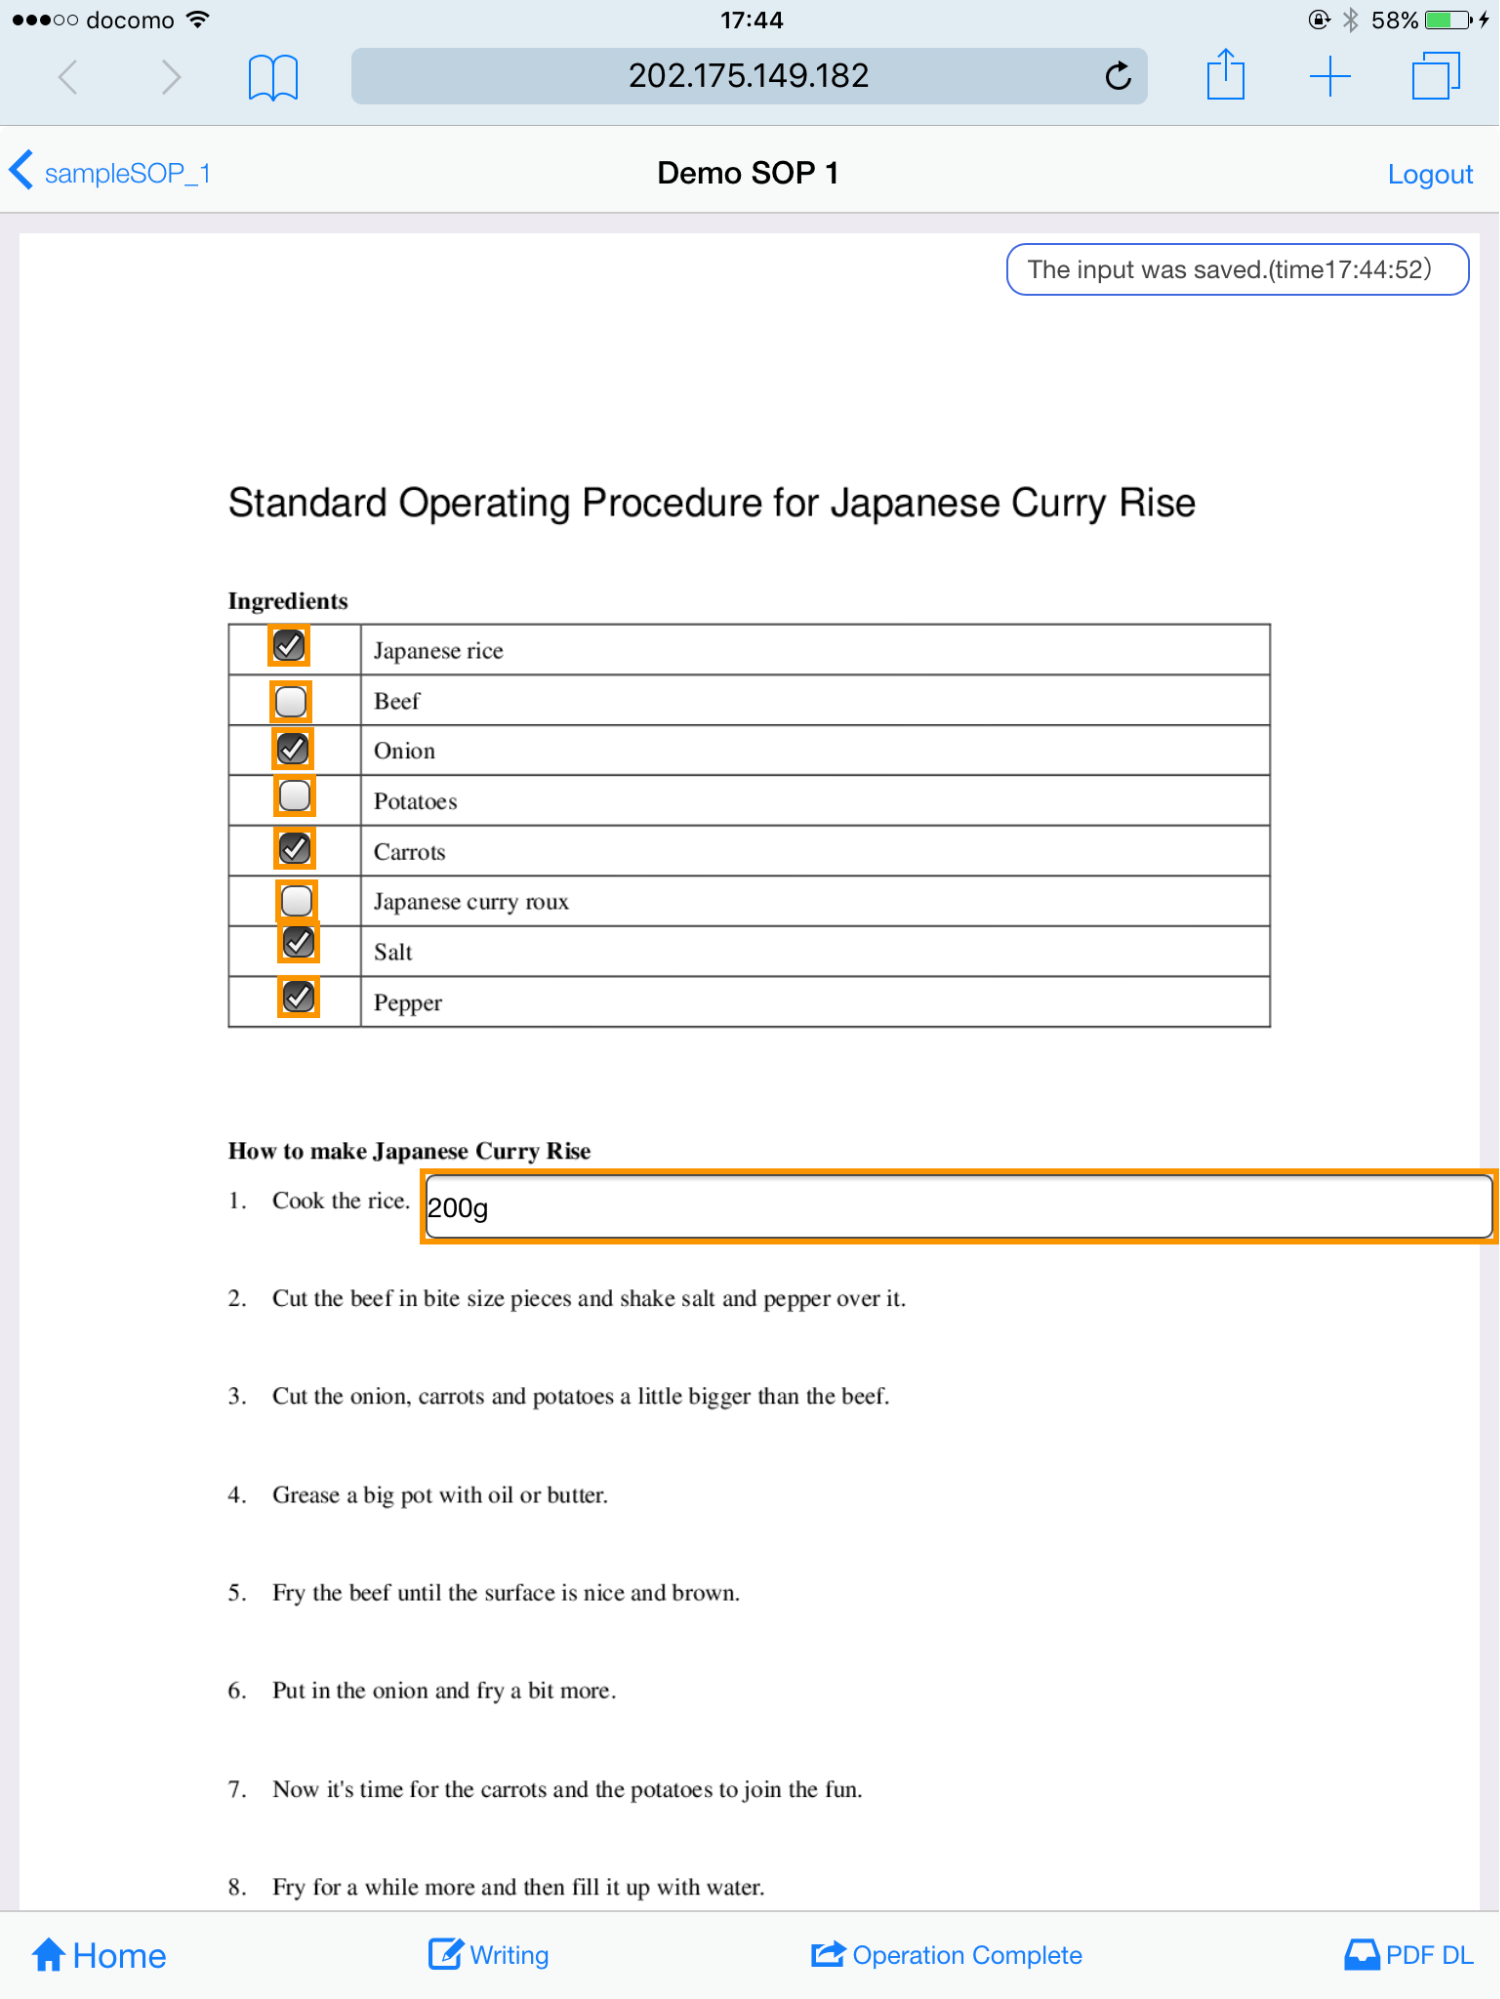
The SOP client application has an automatic save function that works at every operation.
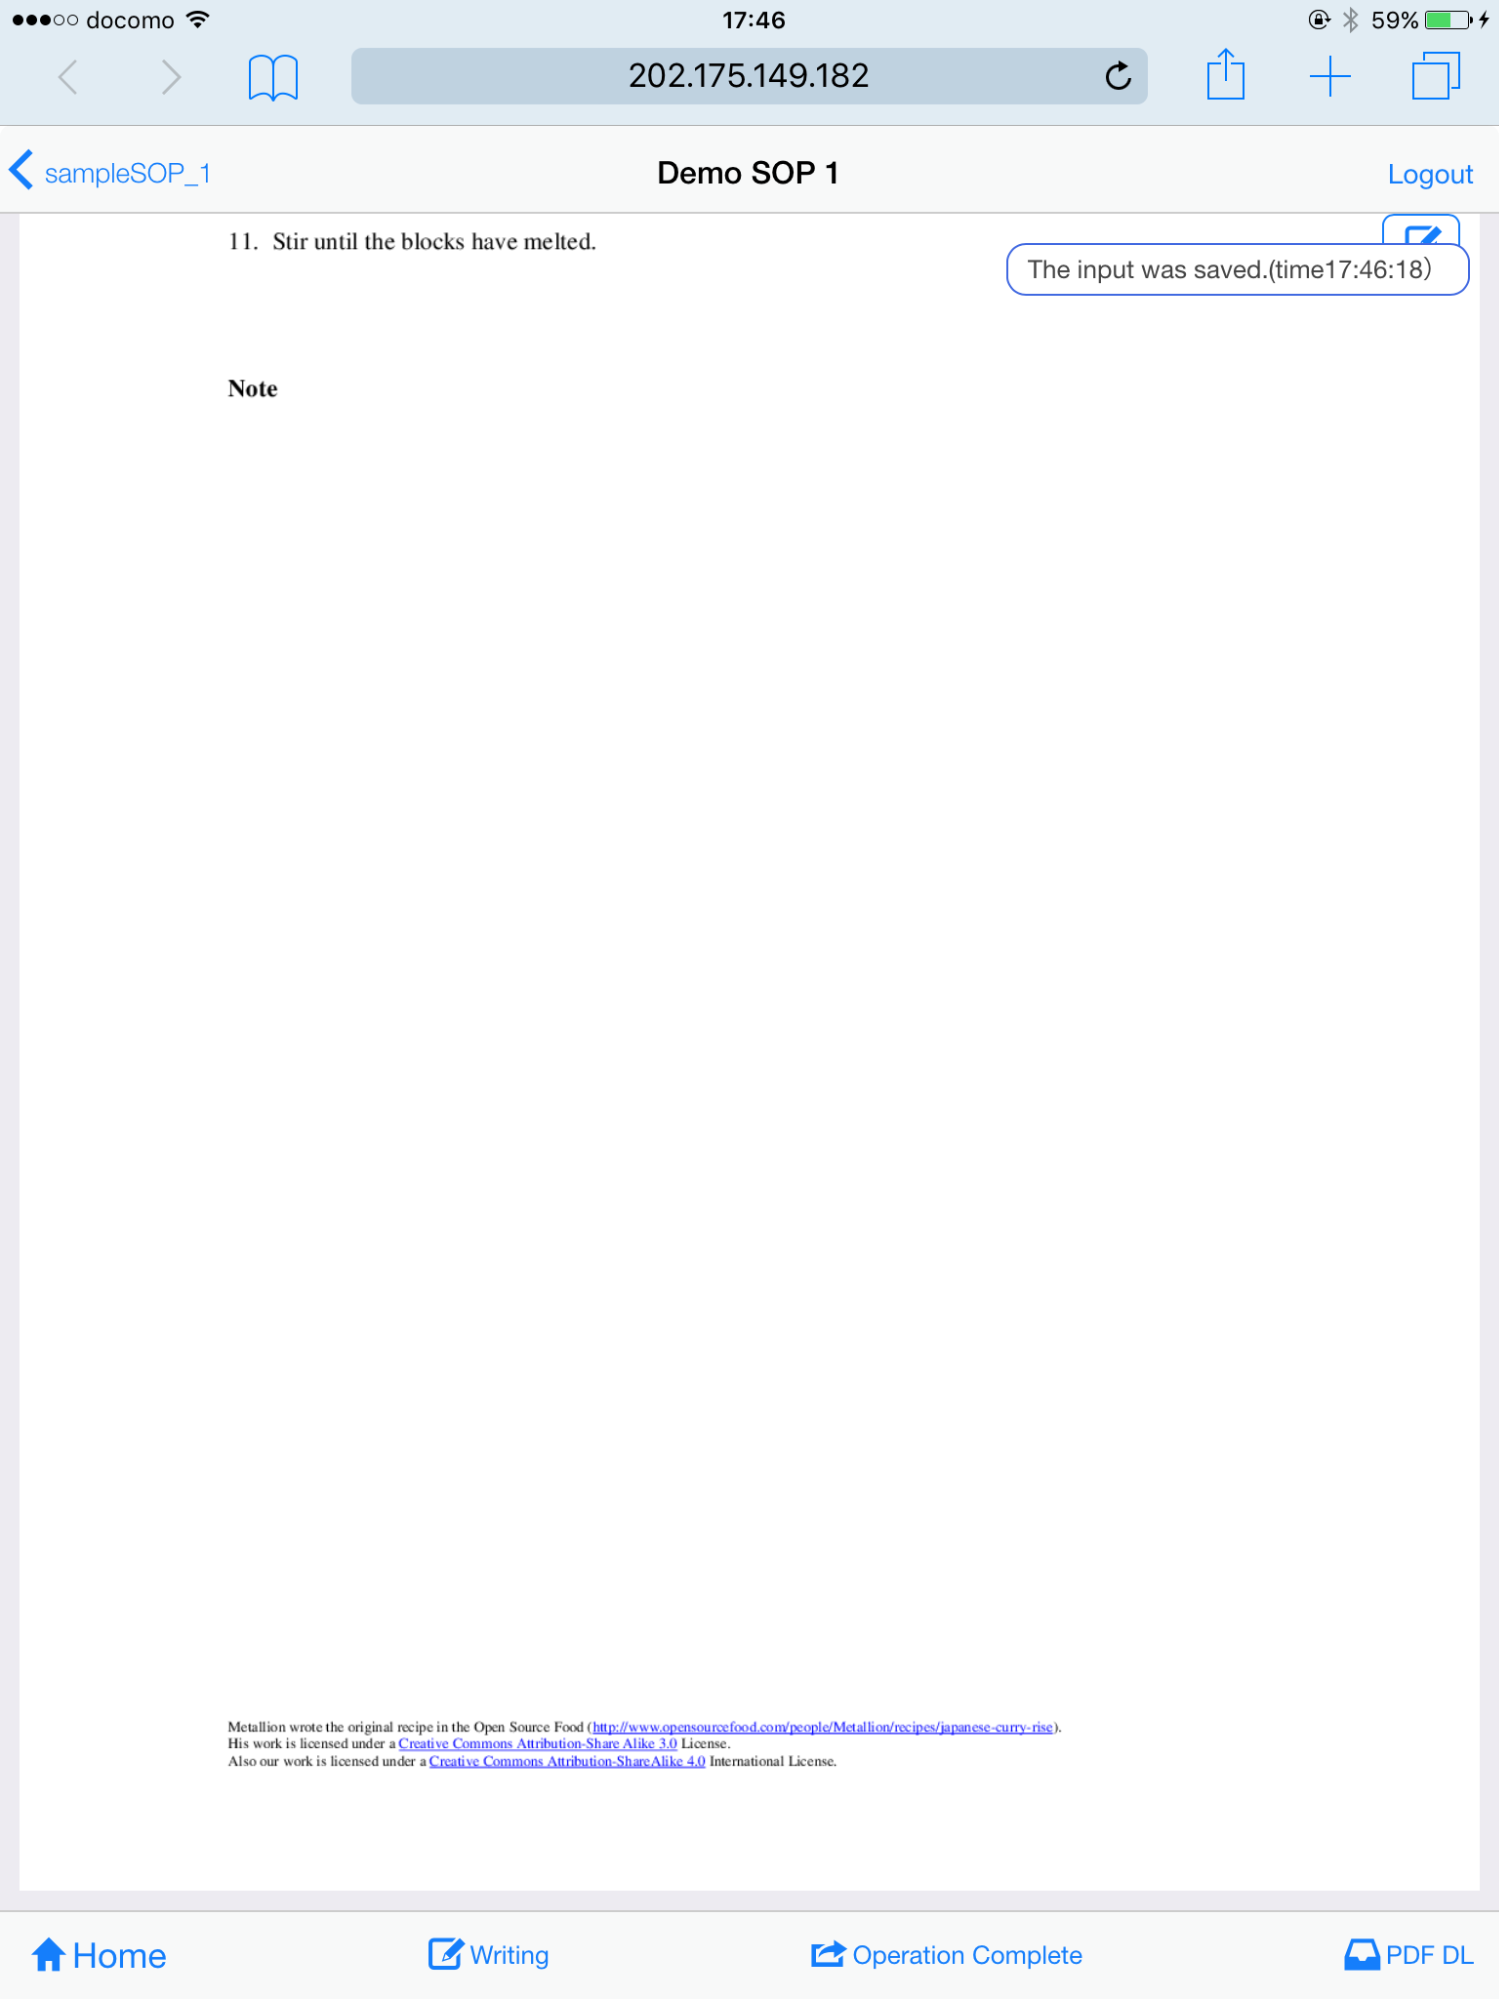
- If you need to remark a comment to a procedure using handwriting, then click the “Writing” button at an insertion point. So “Handwriting Board” will pop-up as the active window, and a user can write a note using a finger or stylus pen, finally please tap the outside of “Handwriting Board” for saving the data.
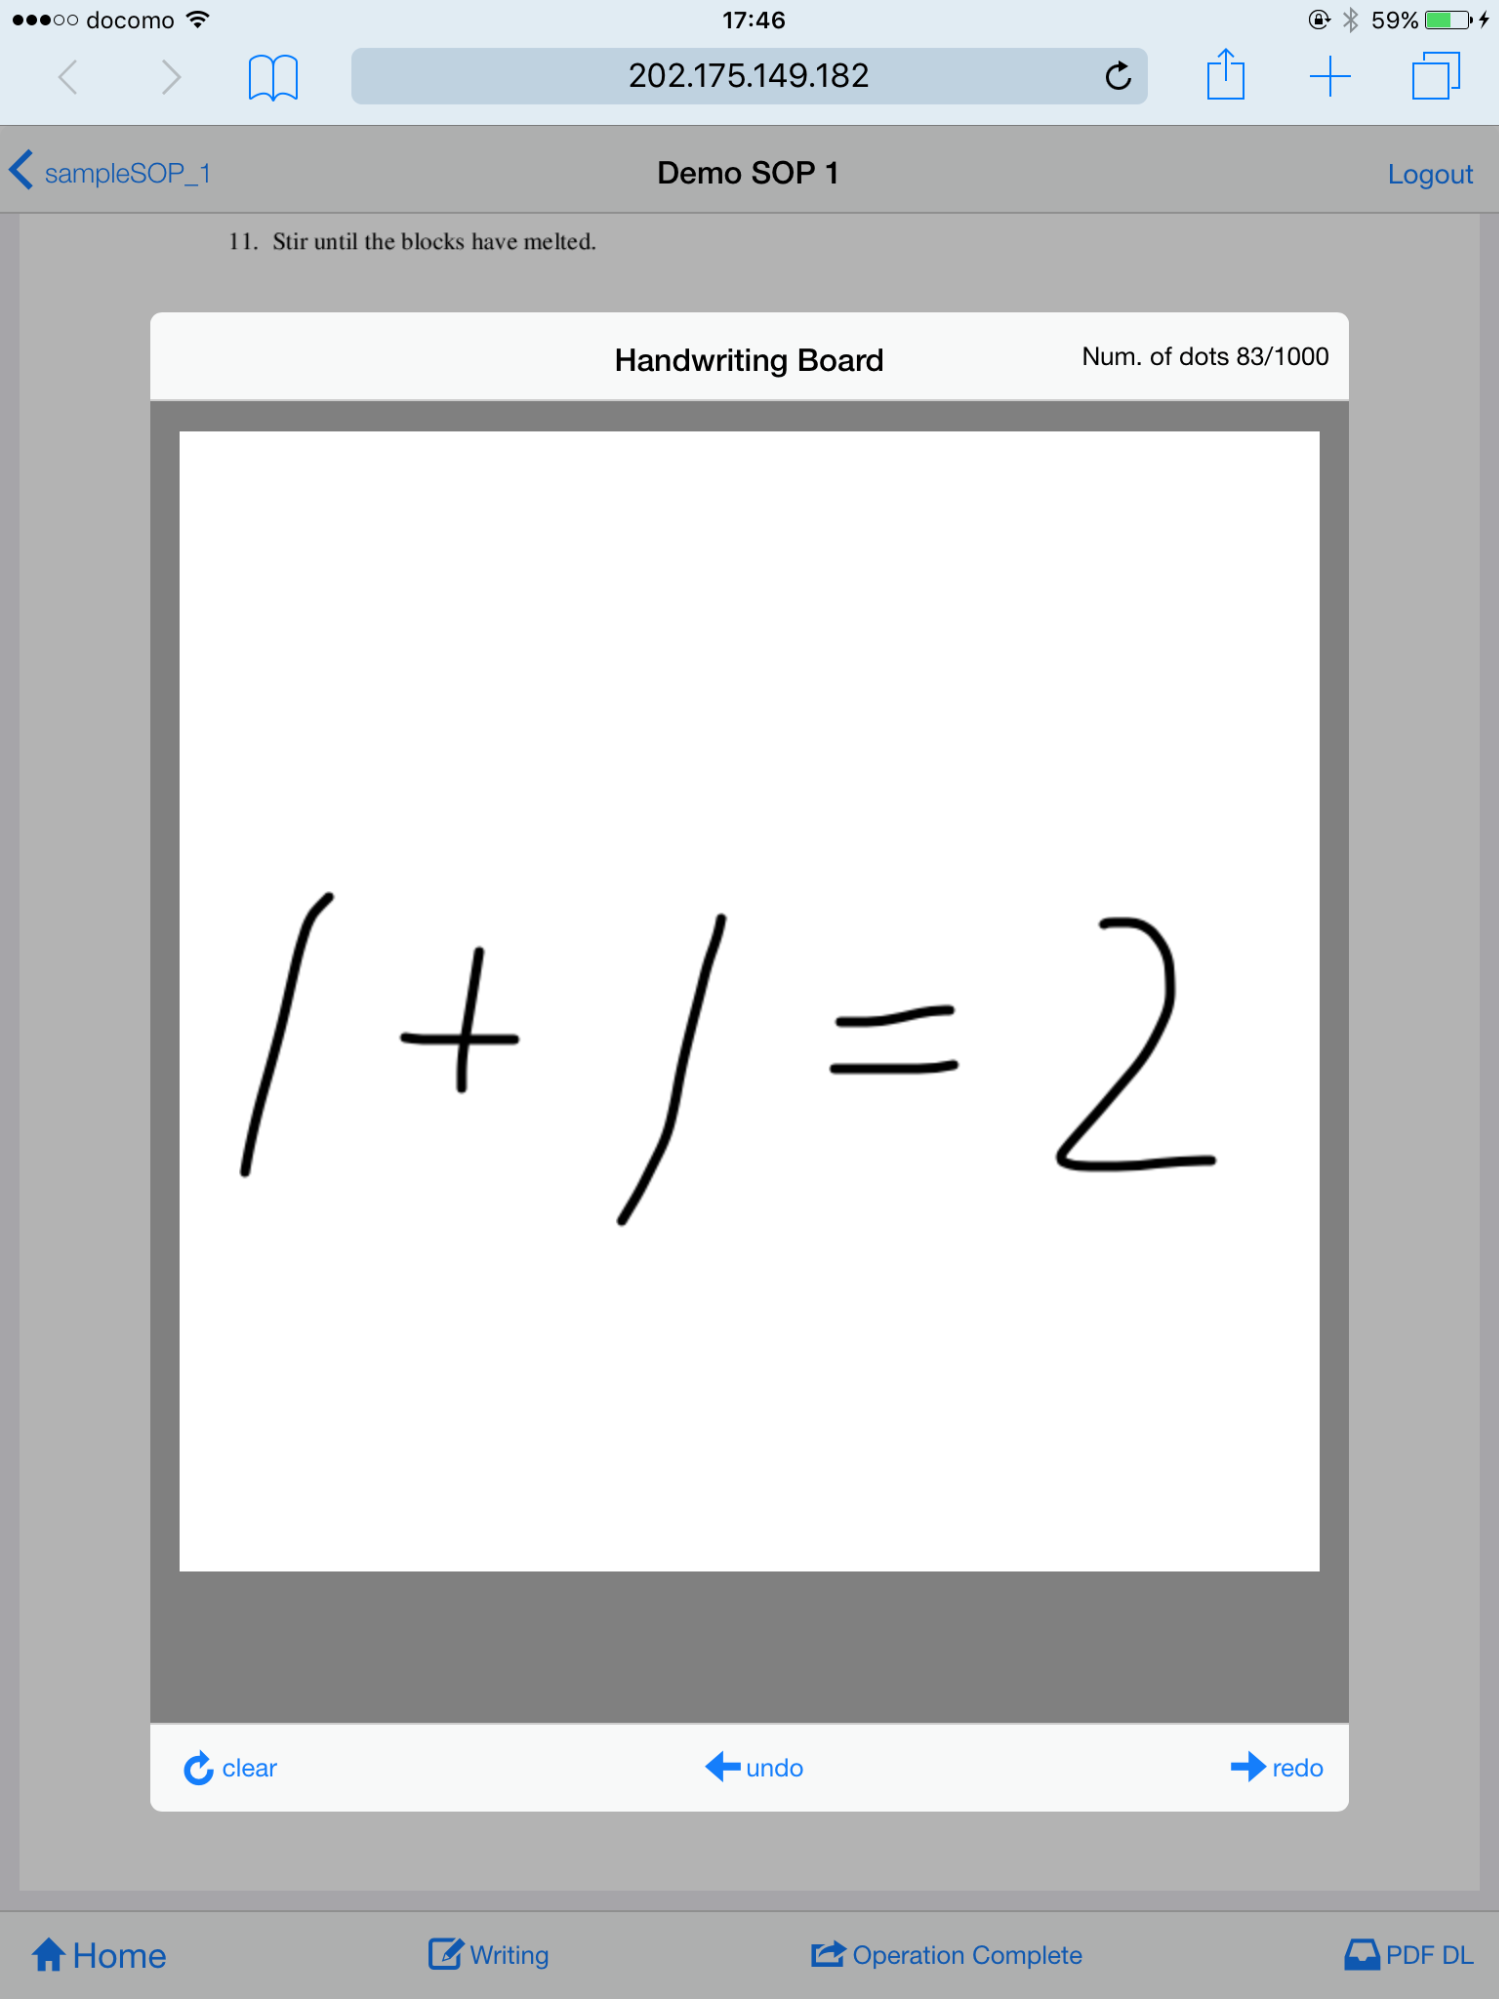
In this figure, the SOP client application has an automatic save function that works at every user operations and a regular intervals. Besides its figure includes a saved remark icon at side upper corner.
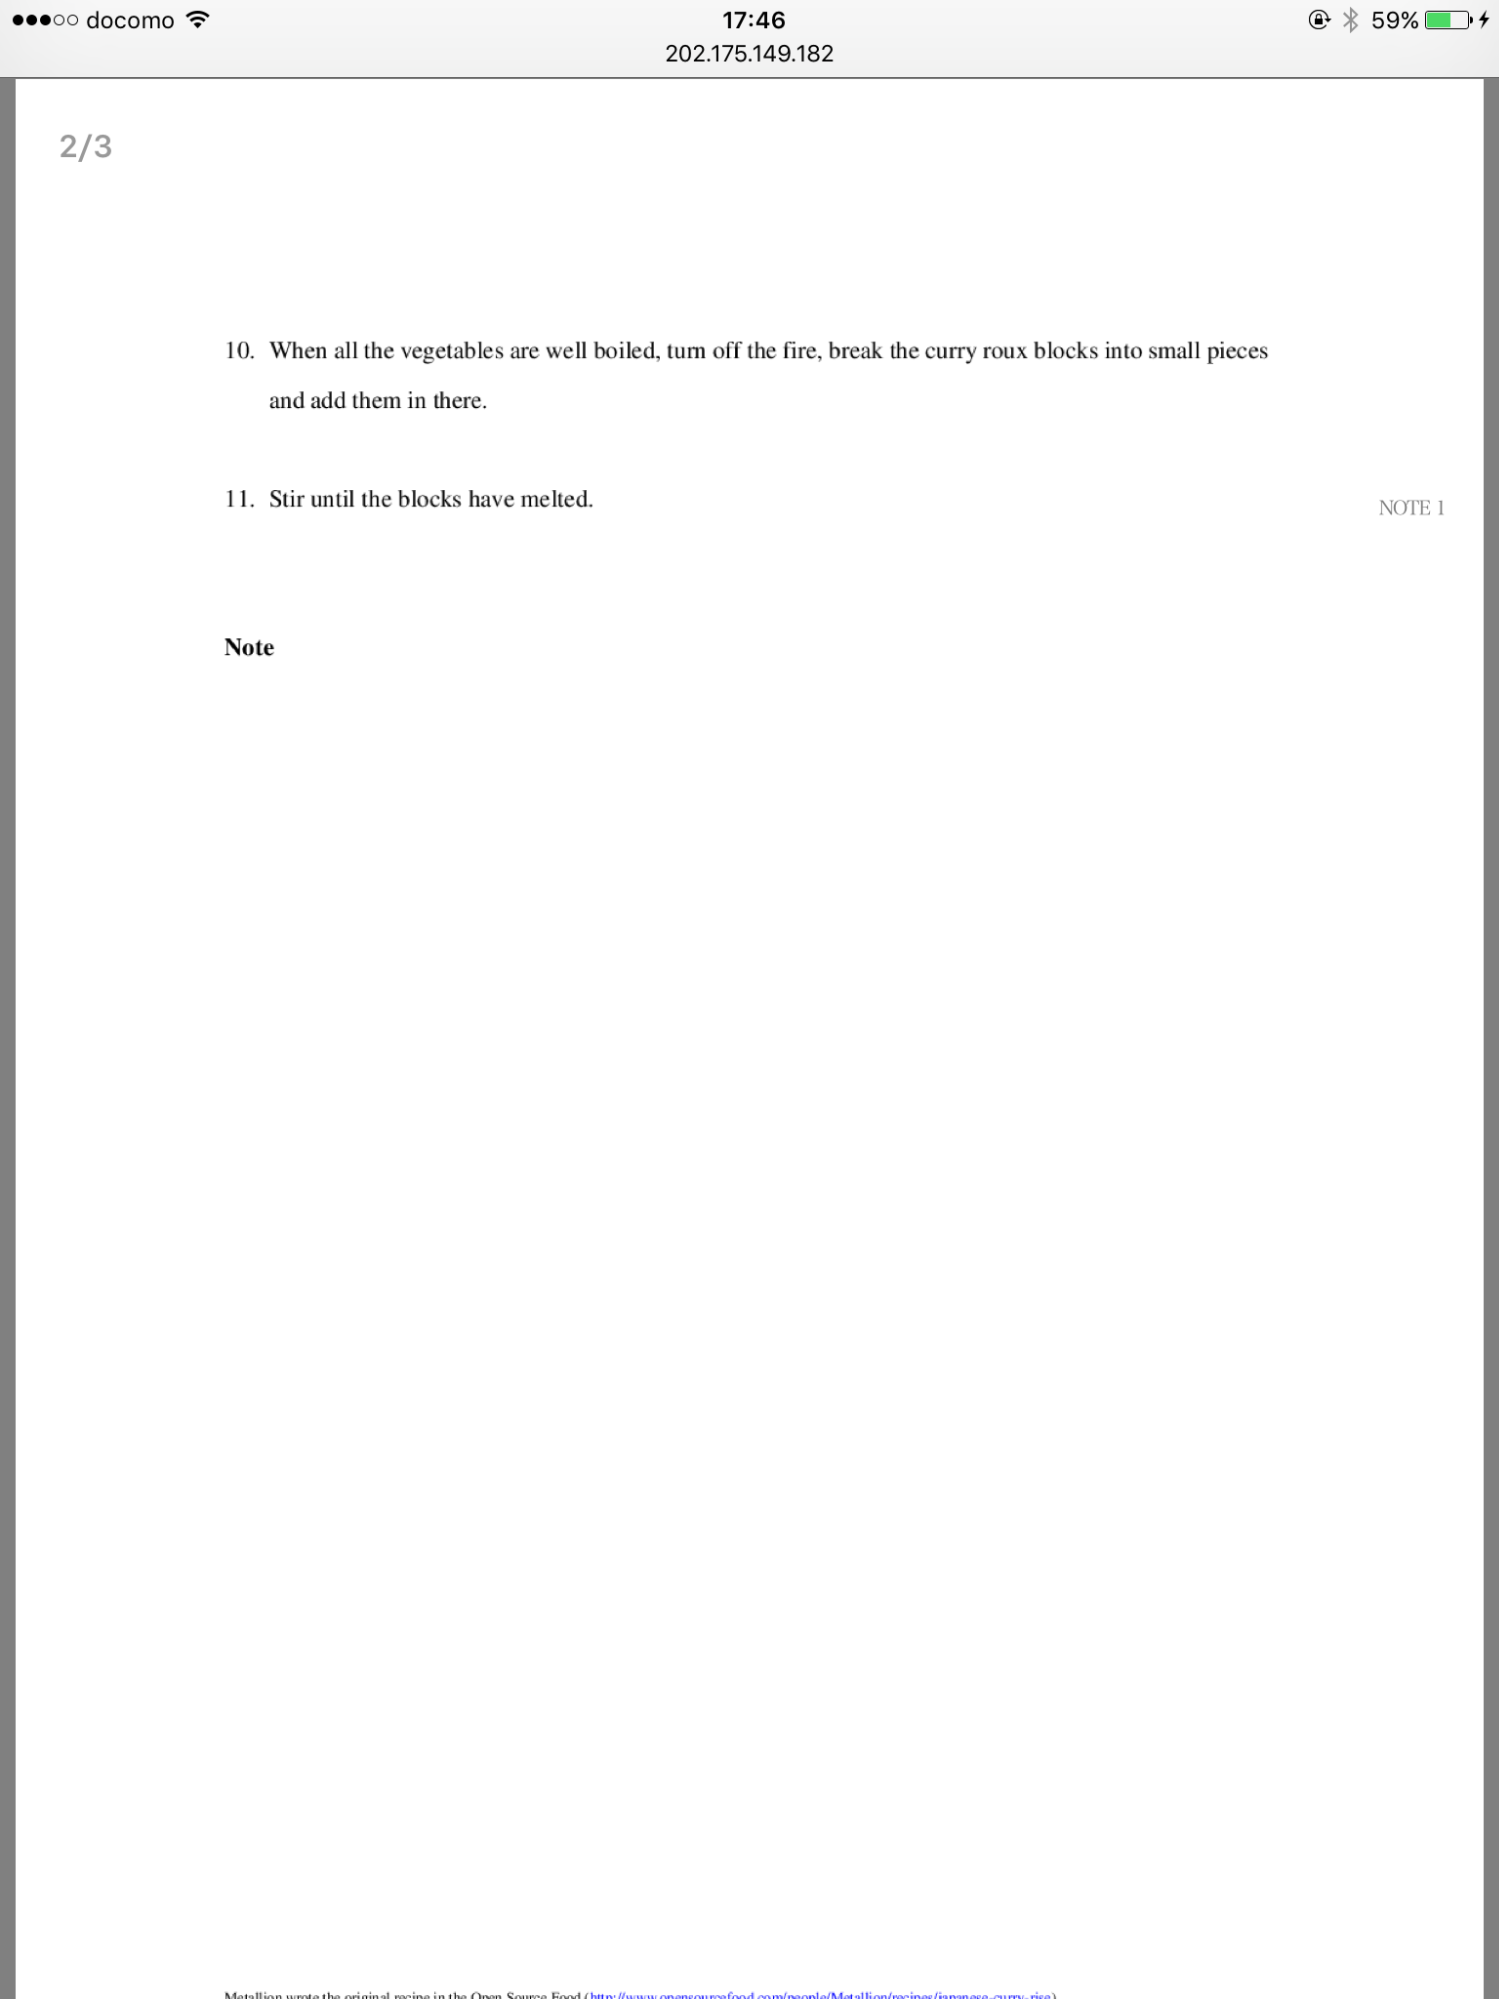
In next figure, this is a downloaded PDF from the SOP client, there is a number of “NOTE” on the side edge of PDF. Its PDF file includes saved handwriting data at the end of the file with a “NOTE” numbers. In the use case, for example, calculation by writing during an experiment; remarking a comment for improving a SOP; recording a date and time of a science discovery things for evidence of patent.

- Lastly, you have to tap “Operation Complete” button, this is a function for finalizing an SOP instance data of a specimen.
FAQs